
Build scope: The Breacher choices below combine documented close-range roles with a reported late-level example. No site-owned comparison has measured that example against every alternative or difficulty.
Build Breacher around a close-range weapon, a safe approach, and the Adrenaline Injector's health refill and damage reduction. Once your unlocks support it, a shotgun setup can connect kills with healing and longer adrenaline uptime. Keep a weapon for targets you cannot safely reach, and leave yourself a retreat before activating the Injector. Breacher can commit to a dangerous opening; it is not permanently invulnerable.
The Gnasher and Lancer Mk1 are the starting pairing. The Incinerator offers another close-combat direction as you progress. A late-level community setup provides useful mod choices, but it does not establish a universal strongest build or a guaranteed Allfather clear. Mission modifiers, your available unlocks, and the enemies around the objective can all change which version is practical.
Pick a loadout you can keep supplied
Your two primary weapons should cover the engagements the squad actually encounters. Double shotguns emphasize close combat, but they also create a shared weakness when an enemy dominates a distant lane. A rifle alongside the Gnasher is easier to manage while you learn approach routes and do not yet have the full adrenaline loop available.
| Direction | Weapon arrangement | Reason to choose it | Main limitation |
|---|---|---|---|
| Starting Breacher | Gnasher and Lancer Mk1 | Close defense with a ranged fallback | You still need to control the rifle's recoil |
| Shotgun specialist | Gnasher and Incinerator when unlocked | Two distinct close-combat options | Distant threats can force a risky approach |
| Flexible frontline | A close weapon and an unlocked rifle | Support a push without charging every target | Less commitment to the double-shotgun loop |
The Lancer Mk1 has strong recoil. Fire it with the intention of landing useful hits, rather than holding the trigger while hoping every round connects. Your class is focused on the frontline, but a weapon that lets you contribute from cover keeps you useful when the battlefield is not ready for a push.
Use the Incinerator when you can account for its short charge before firing. Start the shot while you have a safe opening, and avoid treating it like an instant replacement for every Gnasher reaction shot. If your close weapon is empty, change the situation instead of remaining in the open while you rebuild the magazine.
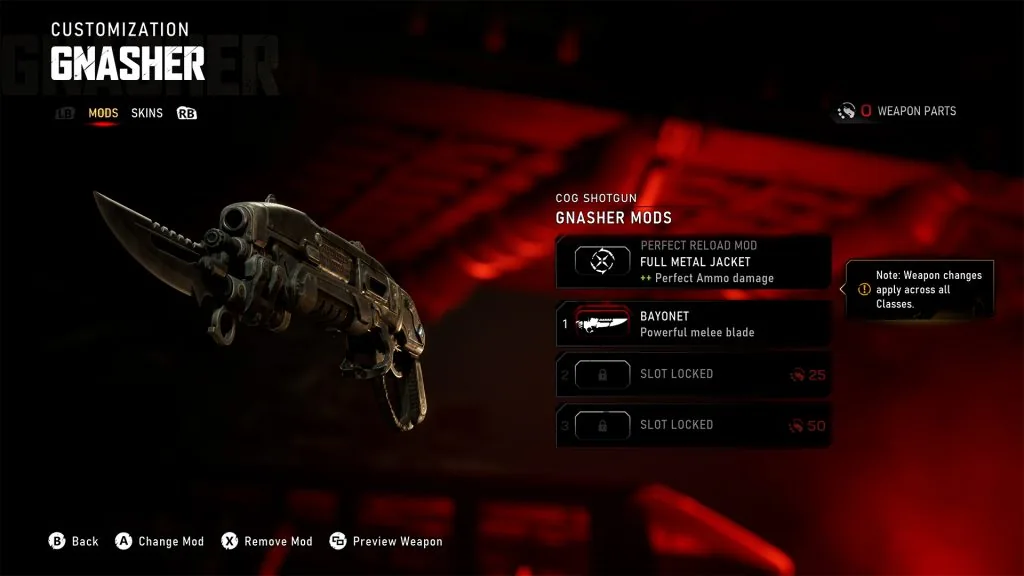
July preview illustration of the Gnasher customization menu. The displayed slot costs are preview values, not a current build recommendation.
Use this late-level shotgun setup as a starting example
One available community setup centers on the Gnasher, Incinerator, high health, and repeated Adrenaline Injector use. Its important idea is the connection between effects: kills during adrenaline improve survival or keep the effect running. The names below describe that example, rather than a mandatory list for every Breacher.
| Layer | Example mod | Intended function |
|---|---|---|
| Tactical Gear | Vitality Amplifier | Adrenaline kills heal |
| Tactical Gear | Retention Battery | Increased adrenaline duration |
| Tactical Gear | Aggressive Compound | Increased adrenaline damage |
| Armor | Battle Hardened | Increased maximum health |
| Armor | Adrenal Tempo | Adrenaline kills reduce Injector cooldown |
| Armor | Flesh Wounds | Improved health regeneration |
| Armor | Adrenaline Cascade | Kills during adrenaline extend adrenaline |
Check availability in your class menu before attempting this arrangement. Do not queue into a difficulty on the assumption that missing pieces are merely optional polish. A setup that depends on kill-triggered healing behaves differently when that healing is unavailable, and the first dangerous encounter may expose the difference.
The loop is also conditional on getting kills. If you spend the entire adrenaline window damaging an armored target without finishing enemies, you are not necessarily triggering the effects that sustain the build. Keep track of what is actually happening rather than assuming a screen effect means the loop will continue forever.
Build the weapons for the shots you take
The same shotgun example uses Full Metal Jacket for extra perfect-ammo damage, High Capacity for additional Gnasher magazine capacity, Slugs for a different critical-damage and range direction, and Bayonet for melee utility. These choices solve different problems. They should not be treated as a package that automatically fixes aim, reload timing, and unsafe positioning.
Slugs change the weapon's shooting requirement. A precise shot becomes more important than simply sweeping a close enemy with a familiar pellet pattern. If you are missing the shots needed to sustain your adrenaline loop, return to a configuration you can use consistently. A theoretical critical-damage advantage is unhelpful when the first required kill never happens.
Bayonet adds another close-combat option, but the animation and approach still need a safe opportunity. Do not chase melee attacks through several enemy firing lanes just because the weapon has a blade. Use the option when the target is already within a controlled engagement and the squad can cover the surrounding threats.
For the Incinerator, the example includes Volatile Payloads for extra perfect-ammo damage. Reload quality therefore becomes part of the build's execution. Reload while protected, check your ammunition, and only then spend the Injector to enter the dangerous area. Activating adrenaline with an empty weapon wastes the moment you intended to use for pressure.
Keep the early build simpler
Before the late-level effects are available, play a shorter frontline cycle. Fight from cover, identify an enemy close enough to finish, activate the Injector for the commitment when needed, then return to the squad. Do not try to force the sustained-kill loop with a partial loadout and expect it to behave like a fully progressed demonstration.
Choose the unlocked Armor Mod that addresses your immediate failure. Extra health is a sensible priority when your approaches repeatedly end in a down. Handling or ammunition improvements may matter more when you survive the approach but cannot fire enough useful shots. Inspect the class's newly available choices after successful missions, rather than assuming your first arrangement remains the right one throughout progression.
Your starting Gnasher has six shells without a capacity modification. Plan reloads before entering a crowd and recognize that a shell-by-shell reload lets you regain a limited amount of immediate firepower. A partial reload can keep you functional, but it is not an excuse to begin every push almost empty.
Avoid relying on exact beta execution thresholds. Launch tuning lowered the health threshold for executing Boomer-sized enemies with a Prototype Lancer. Even if your later loadout includes that weapon, a remembered beta percentage is not a safe condition for a close-range attempt.
Activate adrenaline for an opening you can finish
- Check the enemy position, your weapon ammunition, and the nearest usable cover.
- Confirm that your squad can see or support the direction of the push.
- Activate the Adrenaline Injector before the dangerous commitment, rather than after being surrounded.
- Focus on reachable enemies whose defeat supports your configured healing or duration effects.
- Reassess when the effect ends, the target survives, or your route becomes exposed.
- Withdraw or switch to ranged support when the original opening has disappeared.
The purpose of damage reduction is to make a controlled commitment more forgiving. It does not remove incoming pressure from multiple directions. If the next step requires crossing a long open street under heavy fire, look for another route or ask the squad to suppress the lane first.
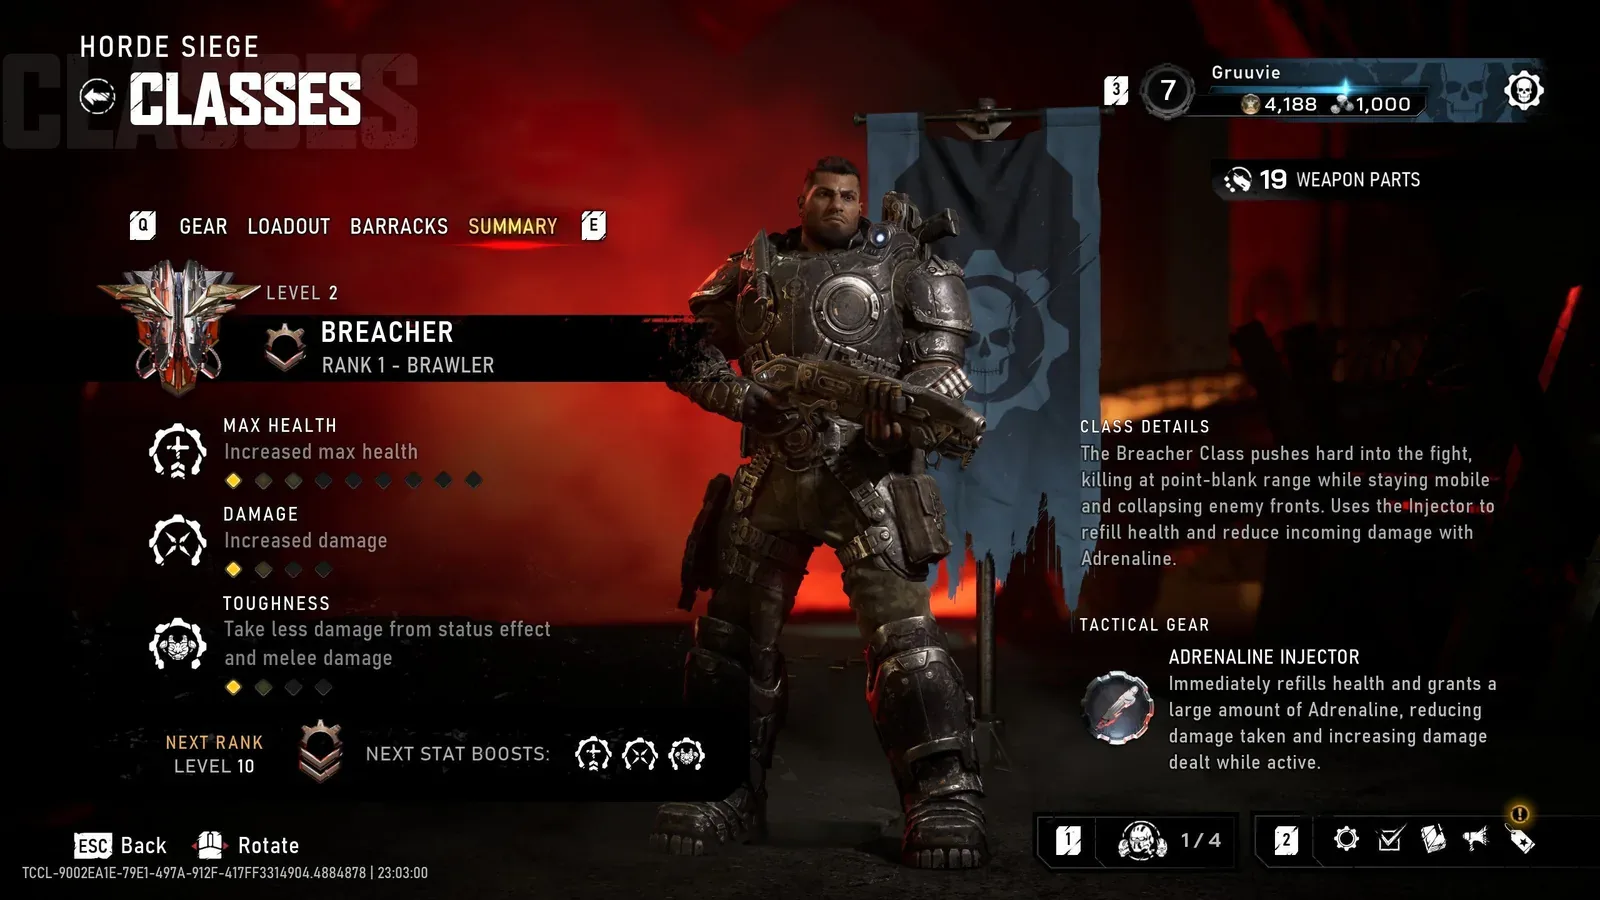
The class menu identifies the Injector and its role; it does not depict activation during a push.
A successful kill should improve the next decision. It may restore health, extend an effect, or give your squad room to advance. It does not mean the next enemy is automatically safe to attack. Check the surrounding battlefield after each close engagement, particularly when a larger enemy arrives behind the target you just defeated.
Change your job with the objective
Secure and Repair
For Secure, push when your squad has created an opening into the occupied area. Choose a reachable target and a cover position beyond it. Your task is to break the local pressure so teammates can take the area, not disappear into the enemy back line.
For Repair, help protect component retrieval. A Breacher can remove enemies near the carrier's route, but chasing kills elsewhere may expose the person carrying the part. Follow the objective's practical route and keep the return path usable. The class's frontline identity should support the repair, not interrupt it.
Defend and Calibrate
During Defend, stay near a lane where enemies are approaching the R.I.G. You do not need to stand directly on their spawn route. Let enemies enter a controlled close range, remove the immediate threat, and return to protection before the next group arrives.
Calibrate can shift the squad among defended zones. Move with that shift and avoid continuing a duel at the old position after the team has relocated. Your shotgun build is useful only where the objective and your support are still present.
Invasions and extraction
Invasion enemies create situations where a double-shotgun setup may need help from teammates with range. Contribute to reachable supporting enemies and the encounter's usable openings. Do not sprint at a large armored target solely to keep an adrenaline effect active.
For extraction, protect the route toward the landing zone and remain aware of boarding. At least one member of your squad must leave successfully for the mission to complete and its Weapon Parts to be retained. A close-combat rampage away from the Raven is a poor trade once the squad has a clear escape opportunity.
Coordinate the push with a Medic and ranged support
Tell the Medic where you plan to commit. Their Stim Vaporizer works within range, so a push far outside support distance creates a different risk than one near the defended line. Agree on where you will retreat before entering the fight.
A Marksman can help remove priority threats along a lane while you deal with close pressure. Assault can stun incoming enemies with the Sonic Disruptor and hold cover-based mid-range damage. Use those openings instead of treating Breacher as an independent solution to every enemy on the map.
Do not build around teammates rescuing every failed charge. Their support is a resource for completing the mission, and repeated rescues can keep the squad from preparing the next objective. The strongest coordination is a push with a clear target, covering fire, and an agreed exit.
Fix the failure before adding more damage
| Repeated problem | First adjustment |
|---|---|
| Injector active but no healing loop | Check whether your equipped effect requires kills and whether you are finishing targets |
| Strong close damage but frequent empty weapons | Prepare ammunition before pushing and review reload or capacity choices |
| Unable to reach distant threats | Keep a ranged fallback or ask a teammate to control that lane |
| Deaths during every approach | Shorten the route, use cover, and stop treating reduction as immunity |
| Build works in one mission but collapses in another | Read modifiers and adjust the loadout to the current conditions |
Test an adjustment on a mission your squad can complete reliably. Keep the rest of the arrangement stable so you can tell whether the change helped. The useful result is a frontline that removes pressure and comes back alive, rather than a build card filled with bonuses that never activate together.