Testing scope: This guide explains how to compare settings on your own PC. We have not recorded a site-owned hardware benchmark for these recommendations, so they do not establish measured FPS gains for a particular GPU.
For the October 7, 2026 launch baseline, the best PC settings are the ones that keep your chosen mode responsive under combat load while retaining the detail you need to read enemies and cover. Start with a moderate preset, your display's native output resolution, a supported upscaler if needed, and a frame cap your PC can sustain. There is no verified universal preset or guaranteed FPS result for every GPU.
Apply the available launch updates before tuning. The September 30 changes fixed graphics settings resetting between launches, expanded Max FPS options, and clarified that the benchmark performance overlay does not include generated frames. A preset copied from the beta or a frame-generation screenshot is therefore a poor substitute for a controlled comparison on your current installation.
Establish a repeatable baseline
Record your output resolution, selected preset, upscaler, frame-generation state, and Max FPS. Run the game's benchmark or revisit the same playable scene before making changes. Use the same mode, because campaign presentation and a busy multiplayer fight can expose different performance pressures.
Keep a small record of your comparison. You only need the settings changed, the resulting responsiveness, and whether the original hitch or slow scene improved. Do not report an FPS gain from a creator's machine as a result achieved on yours.
Start with frame generation off while judging basic responsiveness. You can test it separately afterward if your hardware and the game offer it. This avoids confusing a higher displayed frame count with the underlying performance that governs your input response.
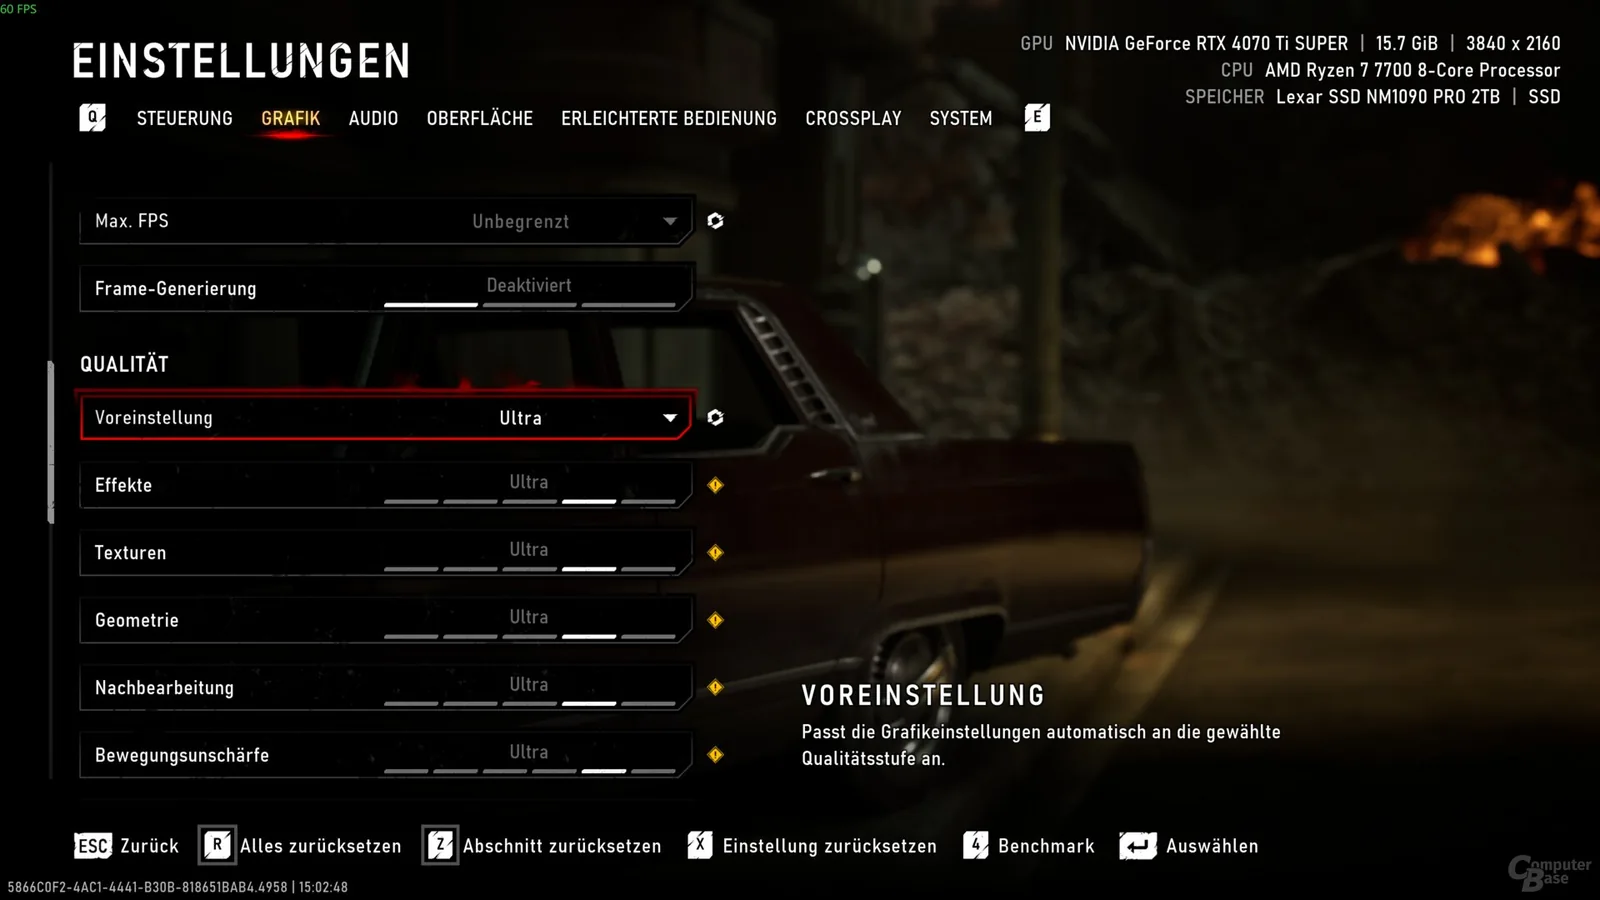
The German menu places the preset below Max FPS and frame generation. Record your own values before changing the baseline; the selected Ultra preset is an illustration.
If the game crashes before the menu, settings optimization is not the first task. Finish launch troubleshooting and get a repeatably playable scene before attempting to tune it.
Choose a starting configuration by your goal
The following settings are starting suggestions to compare on your own PC, not measured optimal values. They deliberately favor a manageable baseline rather than maximum quality everywhere.
| Control | Responsive starting point | Visual-quality comparison |
|---|---|---|
| Output resolution | Native display resolution | Keep the same output for a fair comparison |
| Graphics preset | Medium, then adjust individual settings | High or Ultra only if combat stays stable |
| Upscaling | Start with Quality if more performance is needed | Compare against Native when you have headroom |
| Motion blur | Off if it obscures movement | Personal preference |
| Chromatic aberration | Off for a cleaner view | Personal preference |
| Film grain | Off for a cleaner view | Personal preference |
| Volumetric fog | Medium as an initial compromise | Raise only if the scene remains responsive |
| Frame generation | Off during the baseline test | Test separately on supported hardware |
| Max FPS | A sustainable supported limit | Avoid a limit above what demanding scenes sustain |
These choices do not eliminate every bottleneck. If a particular scene remains slow, change the setting most related to the visual cost you are willing to reduce, then repeat the same test. Avoid changing the entire table at once after your first baseline is established.
Set Max FPS separately from your target
The launch PC Max FPS options are 30, 60, 90, 120, 144, 240, and Unlimited. The launch announcement states that Unlimited does not cap the frame rate. Older beta advice about a hidden limit should not be treated as the current rule.
Choose a supported cap that your PC can maintain in the scenes you actually play. A lower stable cap can feel more consistent than a high setting that the game reaches only in quiet areas. For example, compare the available 60 or 90 options if a higher target repeatedly produces uneven motion on your PC; those are test choices rather than promises of performance.
Dynamic upscaling's Target FPS and Max FPS serve different purposes. A target guides the dynamic scaling behavior shown by the in-game setting, while Max FPS limits the output. Do not assume that typing or selecting a target makes your CPU and GPU capable of sustaining it.
Use your monitor's supported refresh rate correctly, but do not mistake its refresh specification for an FPS guarantee. A high-refresh display cannot create rendering headroom that your graphics configuration does not have.
Use upscaling before lowering everything
If your hardware offers DLSS or FSR in the game, compare an upscaled mode with your native baseline. Start with Quality, inspect moving characters and fine cover detail, and then try a more performance-oriented option if needed. The useful result is a readable moving image and steadier play, not only a larger number in a quiet menu.
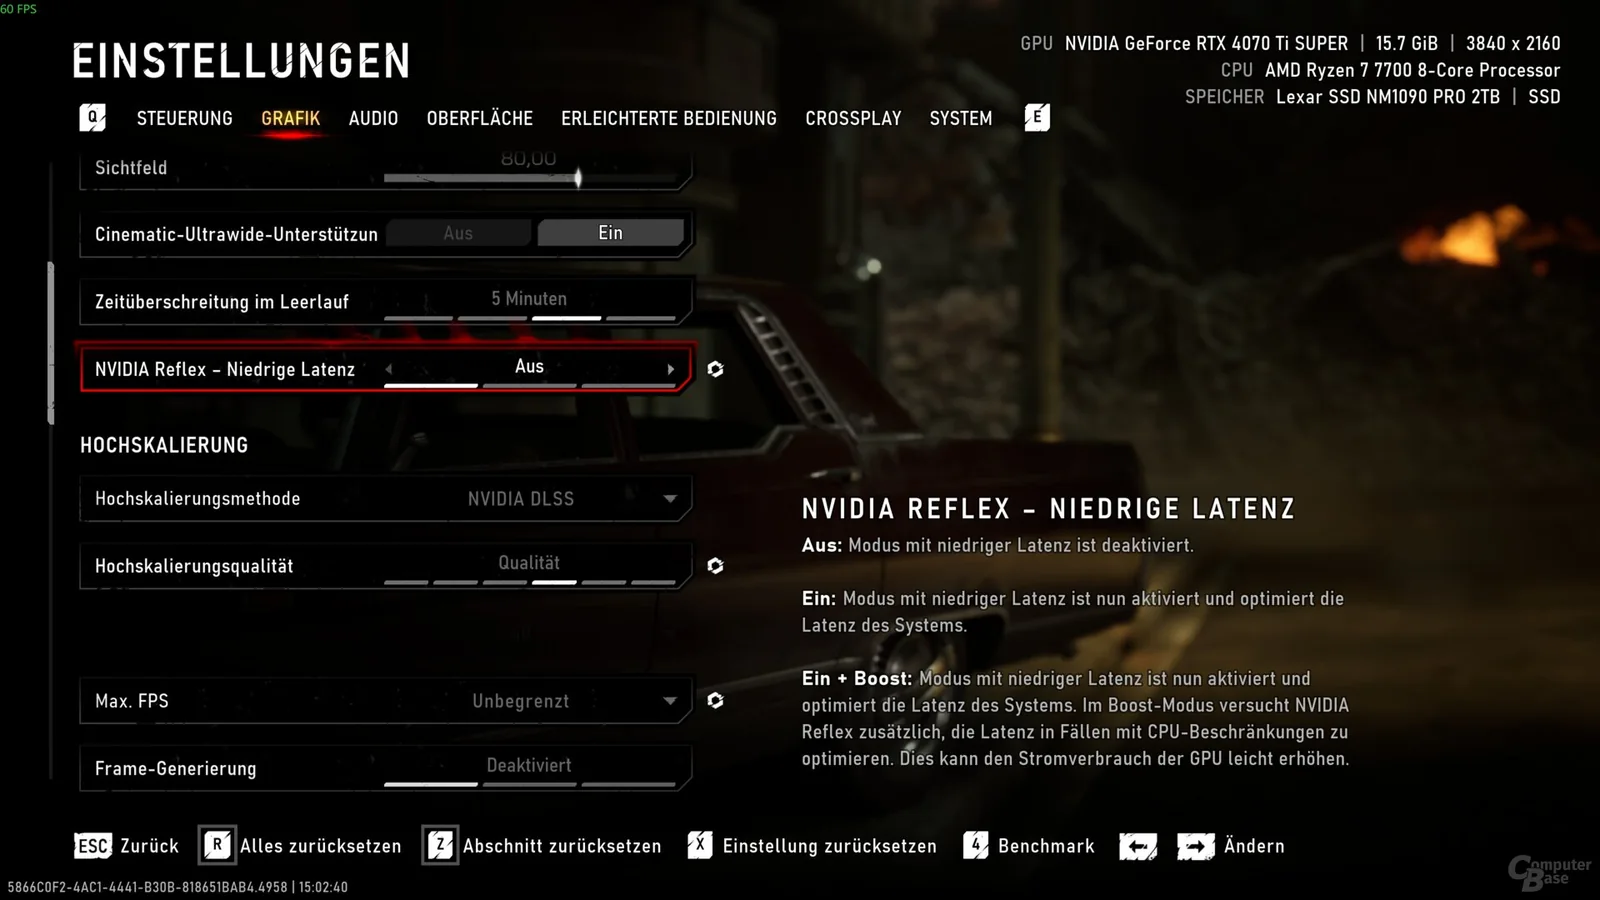
Upscaling method and quality sit above the FPS controls. This example uses NVIDIA DLSS Quality with frame generation disabled; available methods depend on your hardware.
Dynamic upscaling can be useful when you want the game to adjust its internal resolution toward a chosen target. It can also change image sharpness as scenes become more demanding. Compare that behavior during movement instead of judging only a still screenshot.
Optimization videos disagree about driver-level upscaling overrides and make hardware-specific claims. There is not enough consistent evidence here to prescribe one DLSS preset override for every NVIDIA card. Begin with the game's own controls and keep driver overrides at their known baseline until you have a specific problem to investigate.
If upscaling makes distant enemies or thin geometry harder to read, step back toward higher quality and reduce another cost instead. The best compromise depends on the output resolution and your sensitivity to artifacts.
Reduce expensive lighting with a visual comparison
E-Day's PC graphics expose separate global illumination, reflections, ray-traced shadows, sunlight shadows, and ray-tracing geometry controls in its launch graphics settings. Their costs and visible benefits do not move together. Lowering every control to the same level is simple, but it can sacrifice detail that mattered more to you than the performance it returned.
Compare global illumination and shadow quality in the same indoor or outdoor scene. If you are mainly seeking responsiveness, start below Ludicrous and inspect whether a lower level creates distracting noise or loses useful detail. Captured PC comparisons describe noise on some shadows and reflective surfaces at reduced settings, so “lower always looks cleaner” is not a reliable assumption.
For a quality-focused campaign setup, compare raising reflections or ray-traced shadows individually before selecting the full Ludicrous preset. Some captured analysis associates higher levels with cleaner surfaces, but its performance measurements belong to that creator's hardware and scene. This guide cannot transfer those percentages to your PC.
Treat RTX Mega Geometry as an optional quality test
Captured PC analysis describes RTX Mega Geometry as a separate option that can improve some fine shadowing and geometry used for ray-traced lighting. It also describes a cost to performance and memory in its tested configuration, with visual differences varying by scene.
If the option is available on your hardware, keep it off for the initial performance baseline. Test it after you have a stable configuration and inspect a scene where small details or foliage shadows matter to you. If the difference is hard to see while playing, there is little reason to accept a worse experience for that scene.
Do not use the feature name as a guarantee of better performance. Its role in this comparison is additional visual detail, and your own test must decide whether that detail is worth the cost. Availability can depend on hardware, so a missing option should not automatically be treated as a broken installation.
Keep textures and busy-scene effects in context
Texture quality should be adjusted with your GPU memory and the actual scene in mind. Do not assume that every PC needs Low textures just because one performance guide uses them. Start at a moderate level, inspect surfaces you see during play, and reduce it if your configuration shows problems associated with memory pressure or instability.
Effects and destruction can matter more during busy combat than in an empty street. Compare them during a repeatable fight or the benchmark, rather than optimizing exclusively around the main menu. If you reduce these settings, check that explosions, cover destruction, and threats remain readable.
The launch changes include a fix for missing explosion VFX at Low quality on PC. Install those changes before treating absent effects as a deliberate competitive setting. Missing visual information can make a fight harder to read even when a scene appears to run faster.
Keep geometry and detail-object choices tied to what you can actually notice. Raise them after stabilizing the more demanding configuration choices, and avoid using another player's VRAM usage as an exact requirement for yours.
Separate generated frames from input response
Multi-frame generation is optionally supported on PC in the launch announcement. Test it only after choosing your underlying rendering configuration. Compare camera movement, aiming, and UI clarity with the same scene and baseline settings.
The known benchmark overlay issue is specific: it does not include generated frames and can report a lower than accurate FPS. A discrepancy between that overlay and another counter is therefore not enough to prove that frame generation is broken.
At the same time, a higher displayed FPS does not establish a proportionate improvement in input responsiveness. Judge whether aiming feels more consistent and whether visual artifacts interfere with the game. For Versus, give that response more weight than presentation smoothness alone.
Keep the feature enabled only if the comparison helps your play. Do not stack game frame generation and unexplained driver overrides because a video claims that combination produces a universal competitive advantage.
Adjust visibility and display comfort
The launch changes add an FOV slider, film-grain and chromatic-aberration toggles, and improved HDR calibration with independent UI paper-white adjustment. These options can help tailor the view, but there is no single comfortable FOV or HDR midpoint for every display and room.
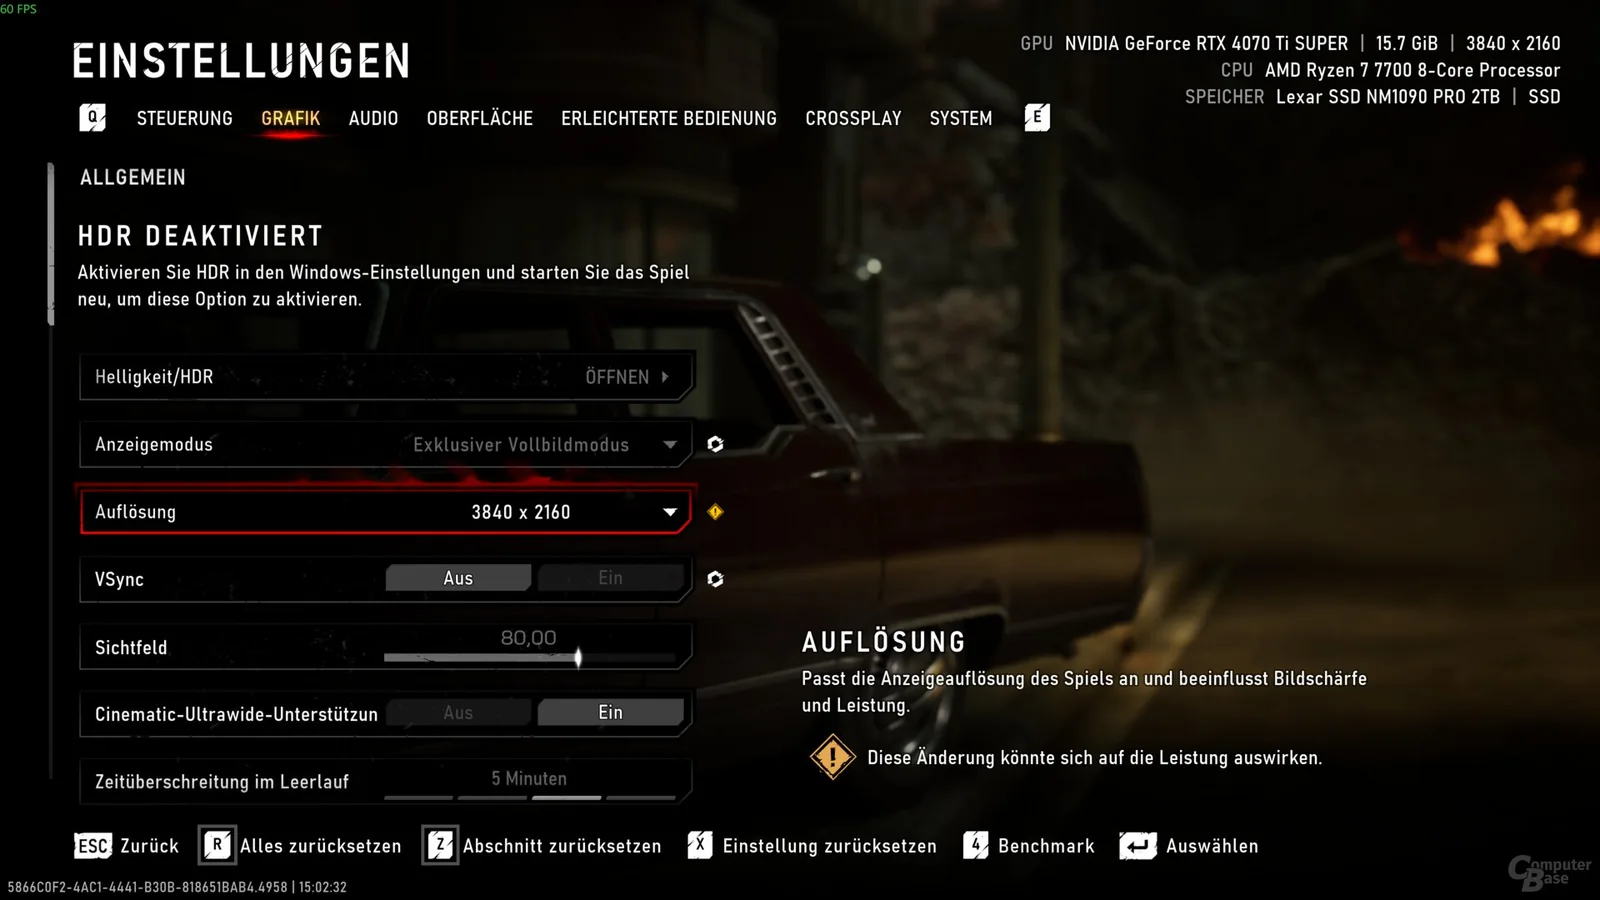
Resolution, field of view and the Brightness/HDR entry appear in the graphics menu. The pictured system reports HDR disabled; it does not show an HDR calibration value.
Choose an FOV that lets you read nearby threats without making distant opponents unnecessarily small. For HDR, use the display's actual capabilities and the game's calibration presentation. Do not copy another player's television brightness number as if it applies to your monitor.
Keep HUD brightness separate from the scene's overall presentation when that independent control is available. Raising interface brightness cannot repair shadow detail in the world. Compare both dark gameplay areas and bright highlights before deciding the calibration is useful.
Motion blur, camera shake, and screen effects are comfort choices. Reducing them may help you follow movement, but describe that as readability rather than an unmeasured FPS boost.
Save the configuration that survives real combat
After the benchmark comparison, play the mode you care about with the selected settings. Check a demanding fight, a normal transition, and a fresh game launch. The launch fix for graphics settings resetting should be installed, but verify that your chosen settings remain selected instead of assuming persistence.
If a new crash or hitch appears, return to the last configuration that behaved consistently and identify the setting changed most recently. Restore it before testing another adjustment. Keep overlays and custom GPU tuning constant while you compare graphics options.
A useful final configuration is one you can reproduce and explain: output resolution, upscaler, frame generation, major quality choices, and frame cap. It does not need to match a creator's full preset or reach their headline FPS. Stable combat and a readable image are the results to verify on your PC.