
Build scope: The Medic advice below prioritizes documented healing and revive roles. It has not been measured in a site-owned squad test, so it does not establish the fastest clear time or highest damage setup.
Build your Medic around reaching nearby teammates, recovering a collapsing fight with the Stim Vaporizer, and keeping a dependable mid-range weapon ready between rescues. Start with the Hammerburst and Gnasher, then consider the Gut-Puncher when it becomes available for explosive utility. The useful build is the one that keeps you standing long enough to restore the squad; a damage-focused setup that repeatedly strands you away from teammates defeats the class's purpose.
Launch tuning adjusted Medic stim duration and reduced the Gut-Puncher's spare ammunition. There is no established post-launch loadout that can be called the strongest in every mission. Treat duration, cooldown, reach, and weapon handling as choices around your actual problems, rather than copying a beta setup and assuming its timings still apply.
Assemble the build around three jobs
Medic has faster health regeneration and a Stim Vaporizer that heals and revives Gears within range. That includes downed players from the other squads sharing the battlefield. Your first job is to remain close enough to the fight for that area effect to matter. Your second is to remove pressure while teammates recover. Your third is to stay alive when the squad begins moving again.
| Build layer | Practical priority | What it should solve |
|---|---|---|
| Tactical Gear | Stim availability and useful coverage | A recovery tool that reaches the players actually taking damage |
| Armor Mods | Survival and dependable weapon handling | Staying functional while changing between shooting and support |
| Primary weapon | Controlled mid-range damage | Contributing without abandoning revive distance |
| Second weapon | Close defense or explosive utility | A rushed enemy or an objective your rifle cannot efficiently answer |
| Equipment slot | The next objective's immediate need | A defensive tool or grenade selected before contact |
This is a build plan, not a requirement to own every possible upgrade. A low-level Medic can already perform the defining job. Additional slots should make that job more reliable before they pull the class into a completely different role.
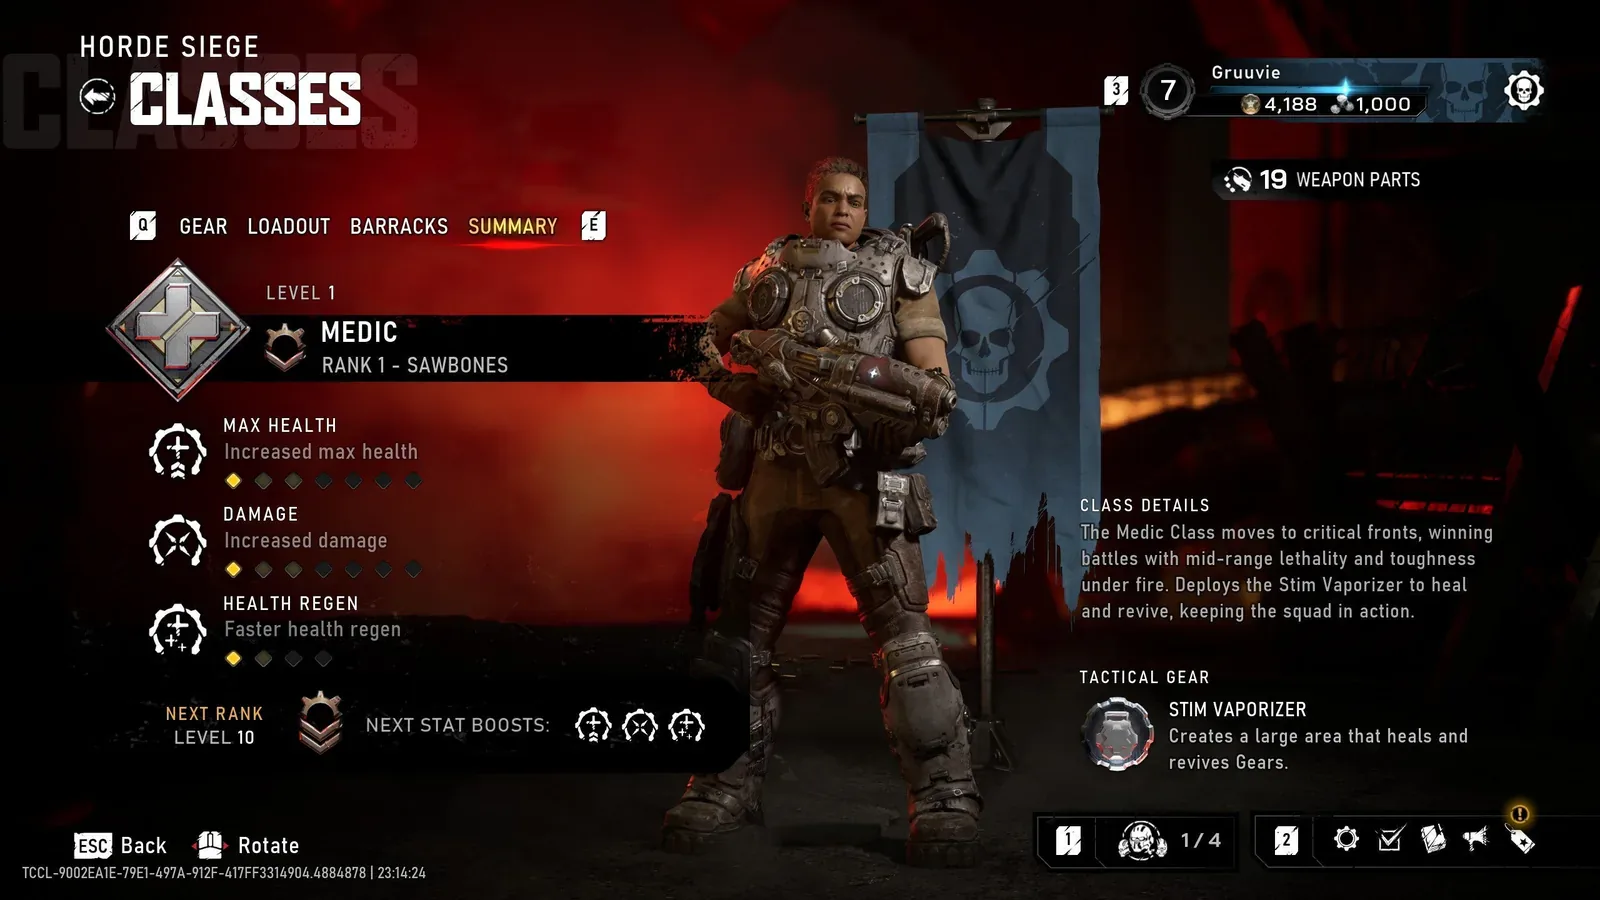
The menu identifies the Medic support tool and its healing and revive function; no live revive is shown.
Keep the starting weapons while learning support distance
The Hammerburst and Gnasher form a useful early pairing because their jobs are distinct. Use the rifle for enemies across a lane and hold the shotgun for threats that arrive close to your position. Avoid carrying the Gnasher forward simply because an injured teammate is ahead of you. First check whether you can reach that teammate through cover and whether anyone is covering the approach.
The Hammerburst fires a six-round burst, and its perfect active reload effect increases fire rate. Launch tuning increased its damage. Those properties make it a sensible starting weapon without needing a claim about an exact damage threshold. Aim deliberately, use the available cover, and reload before the next rush forces your attention onto support.
Your second weapon should cover a real gap. If enemies often break into your position while you are watching teammates, keep the Gnasher. If your squad has close defense covered and you have unlocked the Gut-Puncher, explosive utility becomes more attractive. Changing weapons does not remove the need to stay within a useful distance of the squad.
Do not replace both weapons just to imitate a late-game showcase. Learn which ranges you can comfortably fight at with the options already unlocked. An upgrade is useful when it fixes missed shots, unsafe reloads, or an objective problem you repeatedly encounter.
Choose Stim upgrades by the rescue you cannot complete
Tactical Gear Mods can change cooldown, range, and other effects. Read the available descriptions in your current class menu and choose an effect for a specific support problem. Current values matter because stim duration was adjusted for launch. Do not plan a rescue around a beta duration quoted in a video.
Prioritize availability when successive fights drain the squad
A cooldown improvement is a sensible choice when you repeatedly finish one rescue and reach another fight with the Vaporizer unavailable. It does not justify spending the ability on every small health loss. Keep track of whether your squad is about to defend a position, carry components, or move into a contested area.
Use downtime to check readiness and communicate it. A short call that stim is available gives teammates information for a push. Saying it is unavailable is equally useful: it can stop an aggressive teammate from expecting a recovery tool that you cannot currently provide.
Prioritize coverage when teammates fall outside your position
A range improvement can help when your squad naturally occupies several nearby pieces of cover. It cannot compensate for a teammate fighting across the map. Improve your position first: stand where you can support the objective and see the routes between teammates, rather than following whichever enemy offers the easiest shot.
Choose duration when the existing effect ends before your squad can stabilize within it. That choice only makes sense if teammates stay close enough to use the effect. An extended support window offers little value when everyone immediately runs away from the deployed area.
Use Armor Mods to protect the support player
Armor Mods can change health, ammunition reserves, weapon swap speed, and other soldier properties. For an early Medic, favor the option that prevents your most common support failure. If you repeatedly go down while approaching a teammate, survival deserves attention. If you reach them safely but cannot respond to a close threat, handling or a better secondary weapon may solve more than additional damage.
Faster health regeneration is already part of Medic's identity. It is a reason to respect cover and recover between exposures, not a promise that you can absorb every attack. Keep an escape route visible whenever you stop to support a player in an exposed position.
Do not choose execution-dependent bonuses unless you can safely and regularly execute enemies during your normal Medic play. Running out from the squad to activate a bonus may leave several teammates without support. A less spectacular passive that works from your usual position can be the better choice for this role.
Evaluate ammunition needs across a whole objective. A reserve improvement is useful if you repeatedly run dry while protecting a position, but it should not replace checking nearby supplies before combat. Entering the defense prepared reduces the chance that an ammo trip separates you from the people you need to revive.
Add the Gut-Puncher for an objective role
The Gut-Puncher gives Medic an offensive option that can help close emergence holes with explosive ammunition and pressure enemies around a defended area. It is a utility choice alongside your support role. You do not need to turn every encounter into a grenade-launcher fight to get value from it.
Use the weapon when the squad needs an explosive answer, and keep a reliable direct-fire option for ordinary enemies. Launch tuning reduced spare Gut-Puncher ammunition, so excessive firing has a cost even when a beta clip appears to sustain it indefinitely. Check your ammunition before a side objective that depends on explosives.
Incendiary ammunition appears in Medic gameplay setups as an alternative offensive option. Its value is the additional fire pressure it offers, not a proven claim that it produces the highest damage. Compare the ammunition's displayed effect with the task your squad needs performed. A changed ammunition type should never be assumed to preserve every function of standard explosive rounds.
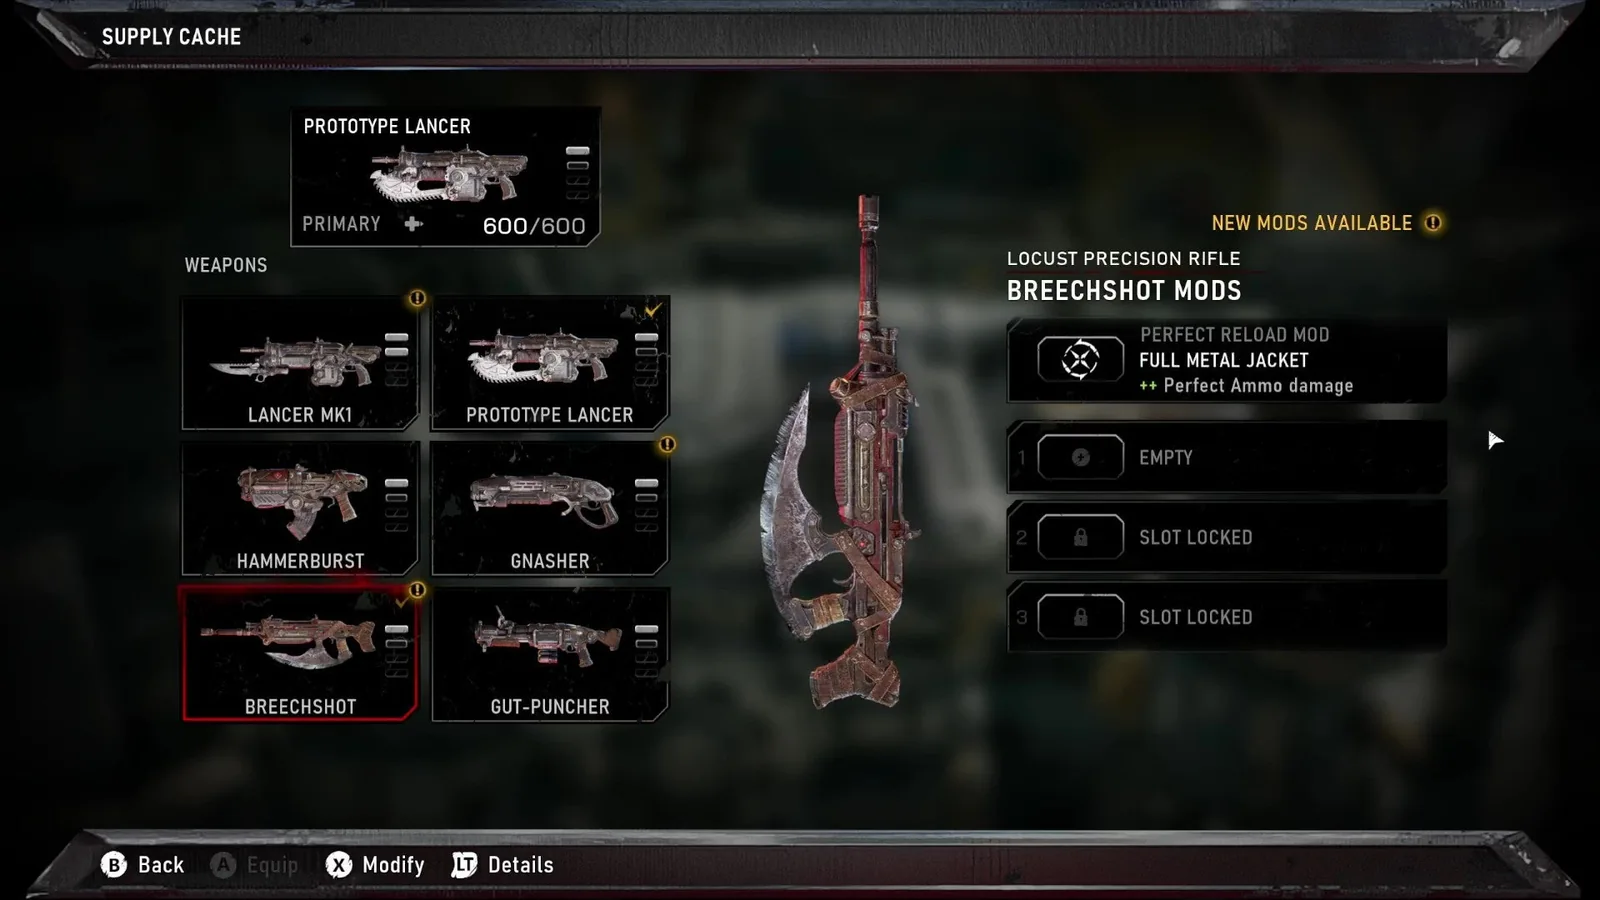
The Gut-Puncher appears in the Campaign weapon list. This screen identifies the weapon, rather than showing its Horde unlock route.
Before starting an emergence-hole task, confirm that your equipped rounds actually perform the required job. Tell teammates you are taking that role so other players can cover nearby enemies. Closing a hole while the squad gets overwhelmed elsewhere is not a successful trade.
Position the Medic differently for each objective
Defend and Horde
During a R.I.G. defense, choose cover with a view of the objective and the nearby positions where teammates are fighting. Stay central enough to support those positions without standing directly in the busiest firing lane. If the squad spreads too far, ask for a regroup before the next heavy attack forces everyone into separate emergencies.
Your damage should help remove enemies pressuring the line. It does not have to win the scoreboard. A revived teammate who immediately has to crawl back through the same enemy fire has not been given a stable recovery. Combine the Vaporizer with covering fire and a usable place to retreat.
Repair and Calibrate
Repair asks the squad to collect and reinstall missing R.I.G. components. Support the route used by the carrier instead of chasing unrelated enemies behind the objective. For Calibrate, the squad must defend zones near the R.I.G.; place yourself where you can move between the active fighting positions without crossing unnecessary open space.
Movement matters more here than a static damage setup. Check teammates before relocating and avoid being the last person unaware that the fight has shifted. The build should travel with the squad rather than demand that every rescue happen at your original cover position.
Secure
A Secure objective asks you to push Locust out of a contested area. Follow the pressure rather than leading an unsupported charge. Let your frontline create an opening, then move into cover that brings the new fighting position within support distance. Keep your weapon ready while approaching; the class ability does not clear every threat for you.
Recover a downed teammate without starting a second emergency
- Identify the downed player and the enemies controlling the approach.
- Move through cover toward a position where the Vaporizer's area can help.
- Ask another standing teammate to cover the most dangerous lane.
- Deploy support when it can reach the rescue, then help remove the pressure around it.
- Regroup after the revive instead of letting the recovered player immediately repeat the same exposed push.
Distinguish a downed player from a killed player. A Gear killed in action leaves COG tags. Squadmates can take those tags to a Supply Cache to revive the player; another squad can also help through tag recovery. The Stim Vaporizer's ordinary revive role applies to downed Gears in range. Do not assume it restores every dead player merely because their tags are nearby.
Spend Energy for the fight you are entering
Supply Cache choices depend on class progression. Equipment and grenades share an inventory slot, so check what a purchase will replace. Select a defense tool when the next problem is holding a position, or a grenade when the squad needs that specific offensive utility.
Launch changes increased equipment costs and Squad Perk Energy costs while reducing some perk effects. Read current prices before spending. A Medic preparing for extraction should not empty their useful options simply to copy an older shopping sequence.
For the final landing-zone fight, stay close enough to support boarding and keep an eye on the squad's surviving players. At least one member of your own squad must extract to complete the mission and retain its Weapon Parts. Your strongest final contribution may be keeping the last standing teammate functional long enough to reach the Raven, rather than chasing another enemy away from the zone.
Adjust the build after the result screen
Review the failure that actually cost the mission. Repeated downs during approaches suggest a position or survival problem. Revives that arrive too late suggest ability availability or communication. Running out of useful ammunition suggests weapon choice, firing discipline, or preparation. These are different failures and need different changes.
Change one layer before the next comparable run. Keep the mission and difficulty manageable while checking the effect. A good Medic build should produce cleaner recoveries, less separation, and more completed objectives. Those outcomes are more useful evidence for your squad than a single impressive damage total from a setup you cannot yet reproduce.