For Gears of War: E-Day collectibles locations, start with your current act and chapter, then match the nearby landmark before searching individual rooms. The route below covers all thirteen Act 1 collectibles, the documented Act 2 locations, and five early Act 3 pickups. Later Act 3 chapters and Acts 4–5 are not covered here, so this is not a complete campaign checklist. Locations are organized for finding narrative collectibles and COG tags; yellow Hard Cases belong to a separate weapon-mod route.
Some directions reveal named areas and mission events. If you want to avoid story spoilers, read only the chapter you are currently playing. A route entry means the item has a documented location, not that it will already be marked as collected in your own campaign. In co-op, check your own records rather than treating the host's completion as your completion.
Use the route without mixing collectible types
A newspaper, COG tag, personal object, and weapon-mod case can sit close together while serving different completion goals. Match the name of the item you need before searching. Opening a nearby yellow case does not establish that you picked up the narrative collectible in the same building. Likewise, a completed side objective does not replace checking the room where an optional object sits.
Use this sequence for each area:
- Identify the chapter and the last major landmark you passed. A train station, clinic, bridge control room, or named storefront is a more useful starting point than an isolated compass direction.
- Locate your target in the corresponding table. Where a direction depends on entering from a particular side, match that approach first.
- Finish the immediate fight before searching exposed bodies, stairways, or windows. Make sure the area is sufficiently safe to move off the main path.
- Inspect the named surface or body. Do not stop at the correct building when the route points to a kitchen, back room, upper floor, or scaffolding outside.
- Record the pickup on your own checklist before advancing to the next story area. If you are uncertain whether the interaction registered, check your own collectible record before retracing a long route.
The tables follow mission groups rather than promising a speedrun order. In the larger Kalona areas, your current main objective may put you closer to a different group of pickups. Collect nearby items together when the route allows, and avoid crossing the district just to preserve the numbering of an external checklist.
Act 1 collectible route
Act 1 contains thirteen narrative collectibles across four chapter groups. Most are brief detours from the main route, but several require looking behind a desk or stepping into a building instead of continuing along the street.
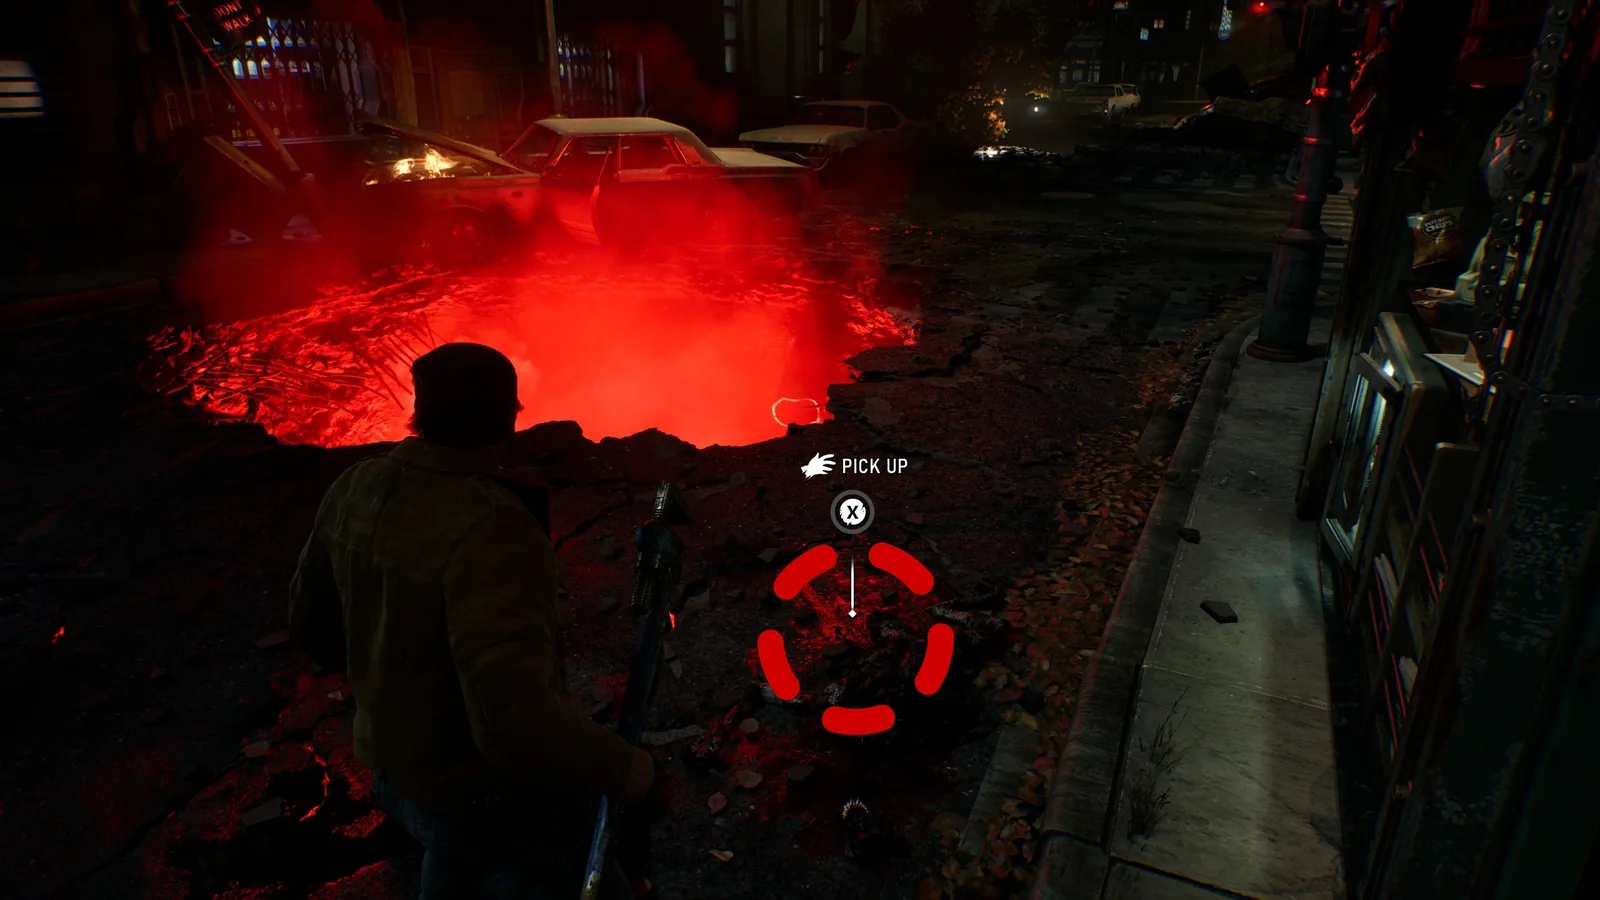
The marked pickup is the Monster Jaw stop in the opening Act 1 route.
Emergence
| Collectible | Landmark and final search point |
|---|---|
| Monster Jaw | At the first emergence hole after the initial Locust fight, check the front-right side near the newspaper stand. |
| Bloody Transit Worker's Helmet | After dropping deeper into the underpass maintenance tunnels, inspect the lit doorway on your left beside the dead worker. |
| Front Page of the Kalona Times | After helping lift fallen concrete for civilians, enter the Cafe and Bakery across the street and search its rear kitchen. |
Treat the bakery as a deliberate stop. The civilian rescue points you along the street, while the newspaper is inside the building opposite. If you reach another main-route transition without going through that kitchen, revisit the bakery before proceeding farther.
Survival of the Fittest
| Collectible | Landmark and final search point |
|---|---|
| KPD Police Bulletin | In the police station's first large desk room, inspect a desk toward the back left, in front of the corkboard. |
| Bloodied Police Chief's Badge | After the shooting-range sequence and firefight, search below the chief's body in the large downstairs meeting room. |
| Army Recruitment Pamphlet | Inside the recruiting station, go behind reception and check the cabinet at the rear. |
| Try On Pilot Helmet | At the helmet display farther right, interact with the third helmet from the left. |
The recruiting station gives you two different searches in the same stop. Look behind reception for the pamphlet, then inspect the helmet display. Finding one should not cause you to leave before checking the other. The pilot helmet is an interaction with a specific display item, so sweeping only loose papers and bodies will miss it.
A Gear In Need
| Collectible | Landmark and final search point |
|---|---|
| Tomatoes, Canned | Enter Pay-N-Save through the freight entrance, pass the first warehouse, and check the leftmost row in the second warehouse. |
| Broken Lancer Bayonet | After the close encounter with a Locust, inspect its body for the broken blade before leaving. |
The supermarket route depends on counting warehouse spaces rather than checking the first shelf you see. At the second warehouse, turn left and inspect the leftmost row. The bayonet search comes after a combat event; pause before continuing along the escape route so that the body does not get overlooked.
Back In the Fold
| Collectible | Landmark and final search point |
|---|---|
| Frontpage of the Tyran Chronicle | While escorting Mayor Shaw beyond the subway, use the alley on the right before the large bar; the newspaper is on the porch at its end. |
| Anti-UIR Propaganda Poster | On the street opposite the clinic, follow the same side to the right and inspect the wall opposite an ambulance. |
| Landa Memorial Medical Supplies Memo | While Clancy is being treated, check the right side of the reception desk in the first room ahead. |
| COG Tags of Private Brick Russo | After the clinic fight, leave through the front gate and search behind the police car near Echo Park's entrance. |
For the street pickups, use the bar, ambulance, and park entrance as separate anchors. Directions such as “right” become unreliable if you are facing back toward the subway. Reorient to the story route before following them, then confirm the specific porch, wall, or vehicle in the final search point.
Act 2 bridge and first neighborhood
Act 2 begins with the bridge route in Bravo Squad. Its control rooms, gantry, and debris section contain several pickups at different elevations. Searching only the roadway will leave you short.
Bravo Squad
| Collectible | Landmark and final search point |
|---|---|
| COG Helmet With Bullet Hole | At the opening street, continue to its end, turn left, and look behind the ruined bus. |
| Sniper Goggles | In the first bridge Control Room, move left toward the far end and inspect the dead Locust. |
| Bridge Worker's Lunch Kit | On the gantry below the bridge, turn left after descending the ladder; look in front of the police-line barriers. |
| Thrashball RUSH Magazine | At the far end of the East Control Room, inspect the small metal caddy beside the milk and coffee. |
| Medic's First Aid Kit | After the final bridge Boomer encounter, reach the lower level and look behind the station wagon, in front of the COG truck. |
Check each control room independently. Their similar function does not mean the same collectible can be found in either room. The lunch kit is below the bridge, while the first-aid kit comes later, after the debris objective sends you to the lower level.
Hold the Line opening section
| Collectible | Landmark and final search point |
|---|---|
| Cinema Filmatica Magazine | Enter Iron Coast Motors from the main entrance, take the left back room, then turn right to the countertop. |
| A Letter Home | During Trapped Family near Last Dollar, clear the enemies and open the garage; follow its corridor right to the framed letter. |
| Thrashies Cereal Box | After helping the Gears at Timgad Prime, enter the store and inspect the counter on the left. |
These stops tie naturally to the neighborhood's side activities. Complete the rescue or fight that provides access, then search the interior before heading to the next marker. Do not assume the objective reward itself includes the object on a counter or wall.
East Kalona and Hold the Line Part 2
This is the densest documented part of the route. Group your search by building: the construction site and nearby restaurant, the apartment building, the bank and river walkway, then the warehouse-side streets.
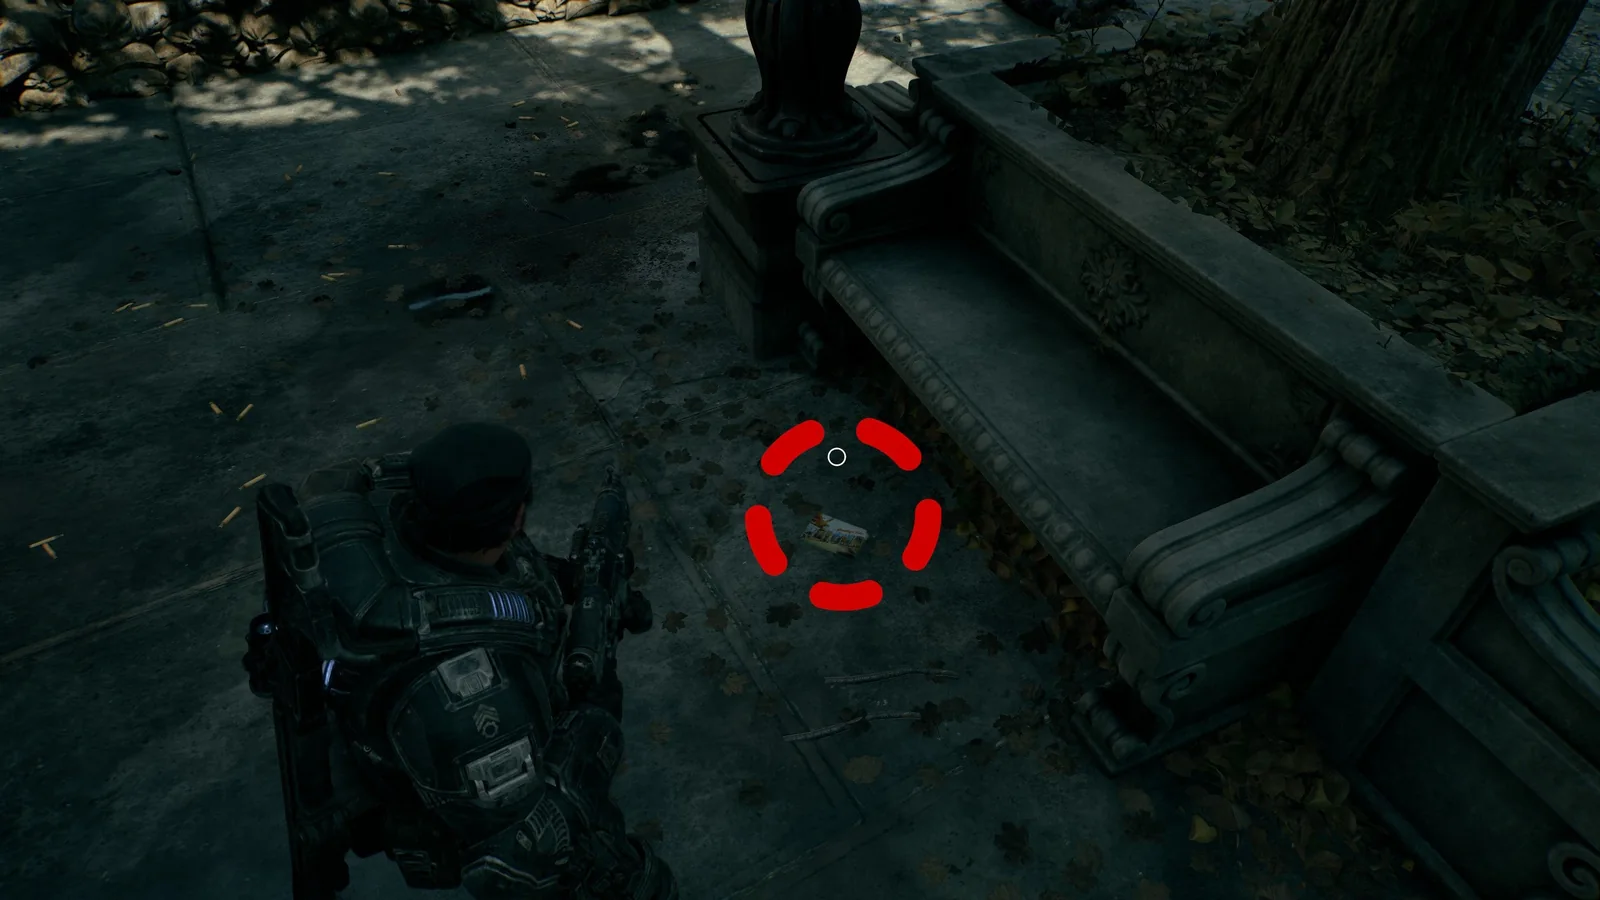
The marked pickup beside the bench identifies the Kalona Postcard search landmark in East Kalona.
| Collectible | Landmark and final search point |
|---|---|
| Kalona Postcard | Turn right leaving the station, descend the steps, pass the pawnbroker, and inspect the far side beneath the stone bench in the barricaded plaza. |
| Foreman's Datapad | At the construction site southwest of the station, enter from the east, head to the back-left area, and turn right into the alcove. |
| Vandalized Salvaging Poster | In Major Burger opposite the construction site, inspect the restroom wall. |
| Emgazi Blitz Display Case | In the northeastern apartment building with a Drone firing from a window, reach the third-floor open apartment and search its bedroom desk. |
| COG Tags of Private Liz Waxman | In that same apartment building, return to the second floor, jump through the window onto scaffolding, and look left. |
| Birthday Card With Toy Lancer | At the collapsed bridge in front of Bank of Tyrus, drop to the walkway and check the ground before a bench on its eastern side. |
| Timgad Refinery Recruitment Poster | Past the eastern bridge, enter the building with the large hotel sign and inspect the wall to the right before the elevator. |
| Tales From the Tyran Night Story Book | At Apartment SOS, climb the side scaffolding to the apartment window with the help sign; check the table on your left inside. |
| COG Tags of Specialist Jada Clemmons | South of Apartment SOS, enter Grind Coffee and search behind the counter. |
| Kalona Metro Fare Notice | South of Grind Coffee, descend into the metro and inspect the wall opposite the turnstiles. |
| COG Tags of Master Sergeant Mark Avamor | Search the loading bay south of Bank of Tyrus; watch the sniper above it. |
| Re: Vibration Complaints | In Warehouse District, enter the live-music building opposite Amberstone Storage Company and inspect the note on a door. |
| Caricature of Colonel Elias Trench | Follow the road south from Amberstone Storage Company, reach the guarded overpass, and inspect its telephone pole. |
| COG Tags of Specialist Arnold Imhatip | In the ruined tunnel beneath the caricature area, search beside the armored vehicle. |
| Major Burger Box | At Major Burger with the southernmost Supply Cache, pass through the kitchen to the back room and inspect the table. |
| COG Tags of Specialist Brendan O'Connell | Opposite Kalona Coast Pharmacy near the southernmost Supply Cache, enter the alley intersection and turn right; check the leftmost body in the group. |
| Photograph and Harmonica From Mags' Apartment | During the main-objective return to Mags' apartment for medication, the relevant cutscene grants this pickup. |
| War Savings Bond | In Bank of Tyrus's vault, inspect the box of bonds to the left. |
The two apartment pickups require different floors. Take the display case upstairs, then deliberately return to the second-floor window for Waxman's tags. For the bank area, the outside walkway, loading bay, and vault are three distinct destinations. Entering the bank does not finish that cluster.
West Kalona, No Gear Left Behind, and Overrun
West Kalona
| Collectible | Landmark and final search point |
|---|---|
| Pendulum Wars Victory Flag | After the courthouse, clear the enemies at the large building, climb toward Shelter 04, then turn right to the newsstand at the street's end. |
| Child's Monster Drawing | Turn back from that newsstand, enter the convenience store on your right, and search the second small room beyond the back room. |
| Holiday Photos | After the crashed-Raven side objective, leave Major Burger and turn right; look beside the newsstand farther along the road. |
| Muster Point Instructions | At Whiskey Squad's square, inspect the poster beneath the butcher-shop sign before investigating the bodies. |
| COG Tags of Sergeant Elijah Adams | During Lone Wolf, search behind the Gear you are helping. |
| Portrait of Chairman Tomas Dalyell | In the mission-ending hotel, reach the mezzanine and inspect the ground between the western elevators. |
Finish nearby street searches before moving toward Whiskey Squad. The photos are documented before that story stop, and the instructions are found in the square itself. Keeping those two contexts separate avoids looking for both around the same bodies.
No Gear Left Behind
| Collectible | Landmark and final search point |
|---|---|
| COG Tags of Private Sal Harkniss | At Charlie Squad's bodies, search the ground where Harkniss lies. |
| COG Tags of Private Siv Strickland | Beside Harkniss, inspect the mud below Strickland's body against the van. |
| Bloodied Spike | Leave the tunnel, turn right up the road, and search the near side of the small alcove on the right. |
| Ink-Covered Wrench | In the Nemacyst-bombarded plaza, keep left, clear the immediate threat, and search beside the body in the smaller plaza farther left. |
| COG Tags of Lieutenant Jane Hawkins | After the Seeder encounter, follow Captain Grey through the courthouse and look right of the exit gate among the bodies. |
Harkniss and Strickland are separate pickups in one location. Inspect both bodies rather than marking the entire Charlie Squad stop complete after collecting a single set of tags.
Overrun
At the rally point where you meet Zee, locate the room's Supply Cache on the left. The Point Fairlight Hangar Data Pad is opposite it. There is also a Hard Case nearby, so check the item name when recording the narrative collectible.
Act 3 Stranded pickups
Only the opening chapter's five locations are included below. Do not use this short list as an Act 3 completion total.
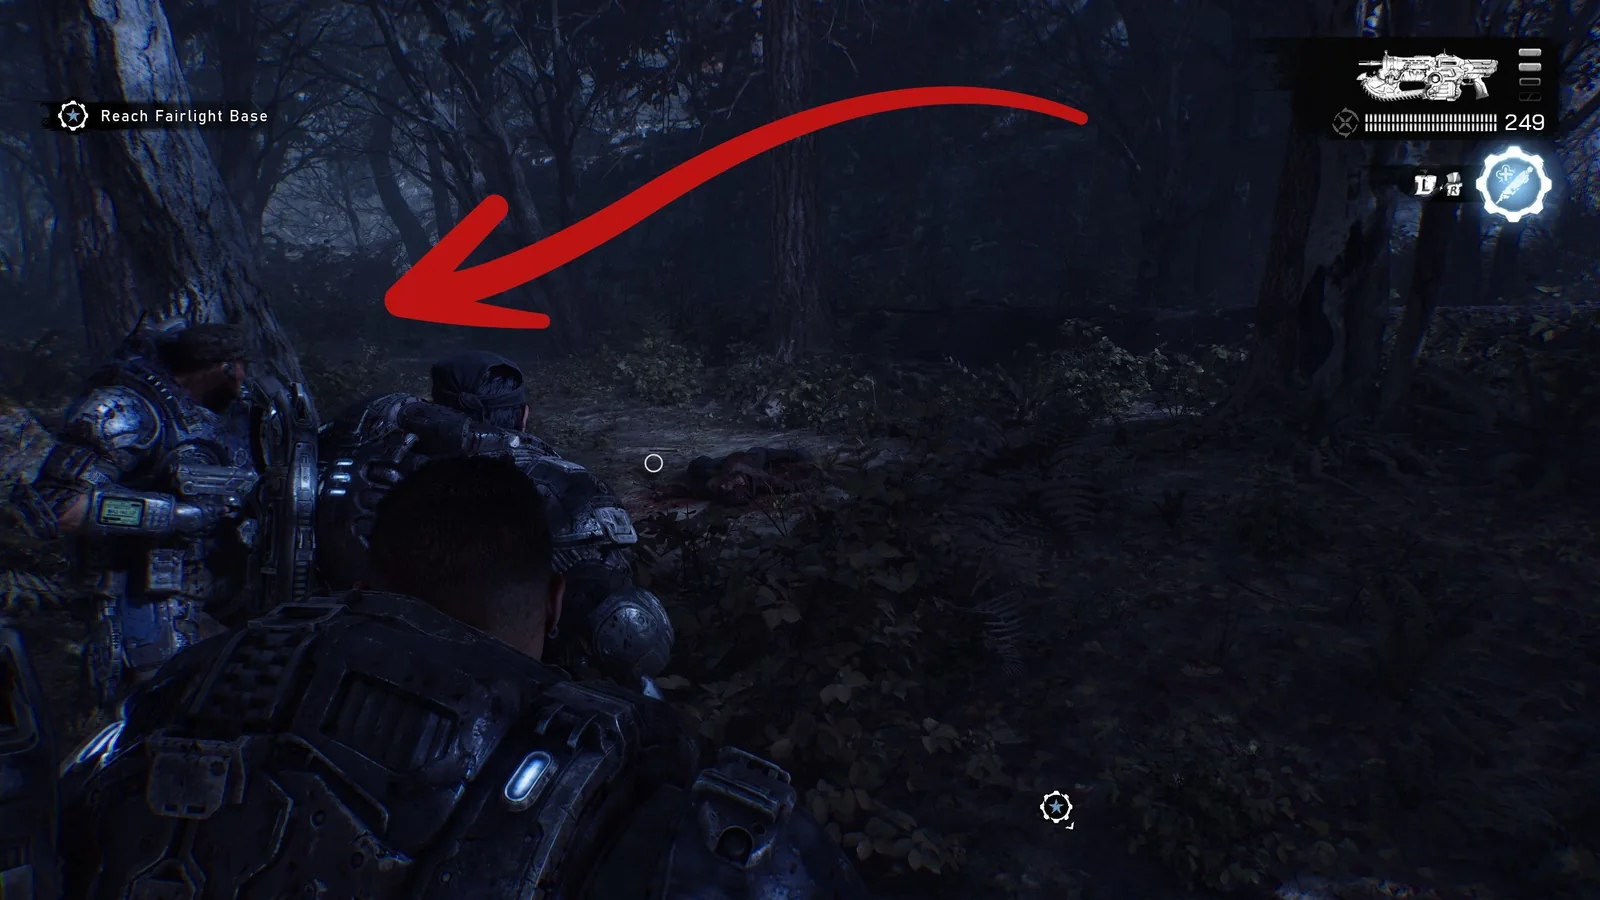
Follow the marked approach toward the COG Army Knife search area between the trees near the prepper’s body.
| Collectible | Landmark and final search point |
|---|---|
| COG Army Knife | After rappelling down the cliffs on the approach to Fairlight, go left from the prepper's body and inspect the space between two trees beside the backpack. |
| Fairlight Rifle Range Sign | After climbing the shipping containers into Fairlight, inspect the accessible side of the main gate wall. |
| Gut-Puncher Grenade Rounds | Inside the ruined hangar, inspect the crate next to the Supply Cache. |
| UIR Soldier Shooting Target | Before entering the substation, go left around its exterior and check the far-left edge of the area. |
| Prepper's Scavenging Map | To the right of the substation entrance, inspect the floor between the middle and rightmost generator stations. |
Check the substation exterior on both sides before entering. The target and map are different objects, and reaching the correct entrance does not put both in the same view. The ruined hangar pickup is another example of why Supply Caches make useful landmarks without being the collectibles themselves.
Resolve a missing pickup without losing your place
If a collectible is not where you expected, first compare your act, chapter, and landmark with the route. A repeated shop name or an apartment reached from another direction can make a correct instruction look wrong. Recheck the final surface and elevation before assuming an item is missing: kitchen versus public room, third-floor bedroom versus second-floor scaffolding, or roadway versus bridge gantry.
For a pickup linked to a rescue or story event, confirm that you have reached that point in the chapter. Do not replace the documented condition with a guess about unlocking it in another mission. In co-op, record which player interacted with the object and verify each player's own progress. The October 5 campaign changes do not justify assuming that joining a completed host save grants every earlier collectible.
When the route does not cover your chapter, keep your remaining entries separate from the confirmed locations above. That preserves a usable checklist without assigning invented positions to later-game items. For a search session, a clearly identified chapter gap is more useful than a supposedly complete list that sends you to the wrong building.