Gears of War: E-Day Hard Case locations begin in Act 2, not Act 1. Look for yellow weapon-mod cases, use the nearby-case notification and map marker to narrow your search, then inspect the actual street, room, or upper walkway. This route includes thirty-five documented Act 2 positions and twenty-eight positions across the first four Act 3 chapters. It does not cover every case in the campaign: one Act 2 entry lacks a usable location, the last two Act 3 chapters have missing directions, and Acts 4–5 are not mapped here.
Hard Cases unlock campaign weapon modifications. They are separate from narrative collectibles and from the Weapon Parts you extract with in Horde Siege. Do not spend time searching Act 1 for these yellow cases or assume a campaign pickup automatically establishes a Horde class unlock. The locations below identify campaign pickups; they are not a Horde leveling or farming route.
Identify a case and confirm its pickup
A Hard Case is a yellow container rather than a loose letter, magazine, or set of COG tags. When you approach one, the game can give a nearby-case notification at the top left, an audio cue, and a map marker. The controller view can also highlight its position and distance when holding LB. Use your own bound input if you have changed controls; this route does not assume a specific keyboard equivalent.
The notification establishes proximity, not the exact floor. A case in an apartment, parking structure, or bridge walkway can be close horizontally while remaining above or below your current route. Look for ladders, stairs, climbable objects, and underpasses before concluding that a marker points through a wall.
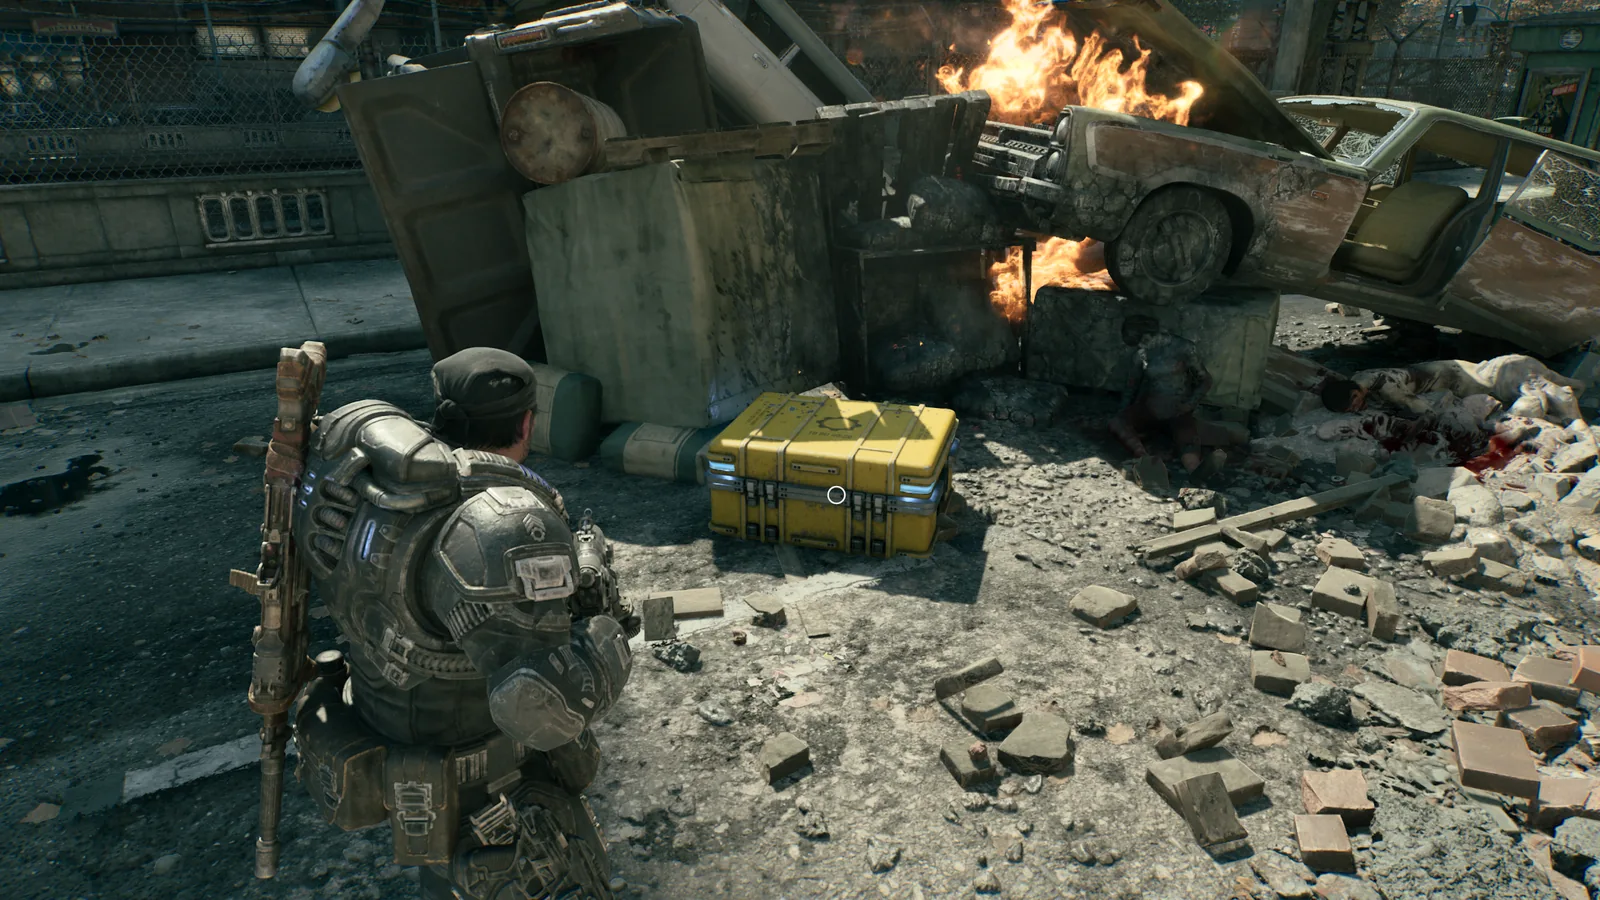
The yellow container is a Hard Case, distinct from the smaller narrative collectibles.
Use this short sequence at each stop:
- Match the act and chapter. Several chapters revisit Kalona landmarks, so the same building name does not identify the same campaign moment.
- Reach the route landmark and clear the immediate threat. Upper floors and alley interiors can have enemies even when the nearby street is quiet.
- Follow the final direction to the container. The tables distinguish reaching a building from opening the case inside it.
- Open the yellow case and check the unlocked modification. The listed reward is an identification aid, not a claim that it is the strongest option for your loadout.
- At a Supply Cache, review any newly available campaign choices. Keep the pickup on your own checklist before moving through a story transition.
Numbers below identify stops within their chapter, not names displayed on the containers themselves. In open areas, collect nearby stops together rather than backtracking solely to follow the numbering.
Act 2 Hold the Line route
Act 2 Chapter 2 contains twenty-seven cases in its chapter count. The route has three progression sections, and not every area is available at the first visit. The directions below cover all entries with an actual documented position. Case 23 is omitted because its final position is not established; it remains a coverage gap rather than an invented stop.
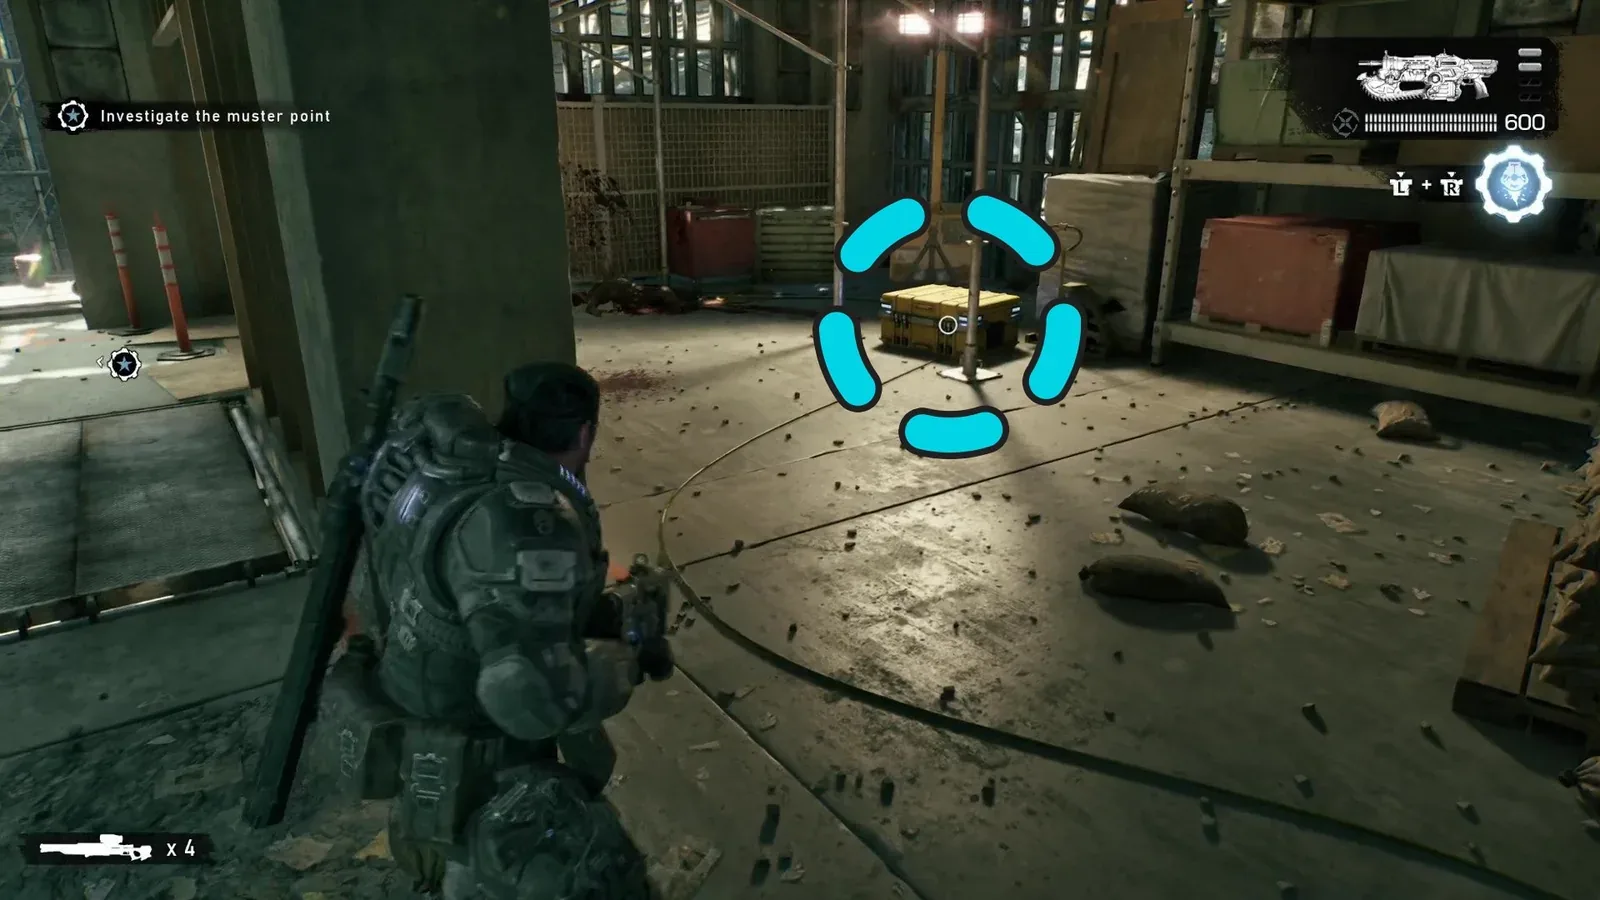
The construction site’s upper level is the second documented Hold the Line case stop.
Opening district and East Kalona
| Case | Position to search | Identifying reward examples |
|---|---|---|
| 1 | Between the used-car side activity and Trapped Family, check the ruined street behind a bus, beside the burning wrecked car. | Spreadshot Burst (Hammerburst); Mobile Stabilizer (Lancer Mk1) |
| 2 | After the station battle opens East Kalona, reach the upper floor of the construction site southwest of the station; search the corner by lights and boxes. | General Mod Slot (Gnasher); Composite Chassis (Gnasher) |
| 3 | Cross the large bridge southwest of the construction site and inspect the outside of Kalona Coast Pharmacy. | Retention Battery (Injector); Burst Capacitor (Disruptor) |
| 4 | On the same western bridge, turn left at the bus and look outside the adjacent building. | Combat Scope (Breechshot) |
| 5 | South of the construction site, climb the Pinnacle Crest container into the building with its corner destroyed; look beside the television. | Incendiary Ammo (Hammerburst) |
| 6 | Enter the underground garage southeast of the station from its surrounding stairs or walkway; search the middle of the garage. | Close-Quarters Barrel (Breechshot); Combat Scope (Proto Lancer) |
| 7 | At the enemy-held parking structure south of the station, climb to the top level and search the storeroom beyond the emergency truck. | Precision Rifling (Lancer Mk1); Laser (Proto Lancer) |
| 8 | Beyond the southeastern bridge, descend to the walkway and inspect the area near the bodies. | Semi Auto (Lancer Mk1); Laser (Gnasher) |
| 9 | In the underground parking west of Bank of Tyrus, use the alarmed truck as a reference; find the supply truck in the opposite direction and look to its right. | Hardened Ammo (Breechshot); Springloaded Mag (Gnasher) |
| 10 | At the eastern edge of Warehouse District, inspect the parking area beside the cargo truck. | Composite Chassis (Lancer Mk1) |
| 11 | Go north from the southernmost Supply Cache to the white truck; climb it or use the building stairs to reach the balcony. | Holo Sight (Hammerburst); Holo Sight (Proto Lancer) |
| 12 | Northwest of the Missing Squad map mark, enter the garage south of a Supply Cache and search beside the truck. | High Capacity Mag (Breechshot); Tactical Scope (Lancer Mk1) |
| 13 | Find the apartment over Audio & Electronics northeast of the southernmost Supply Cache; use the yellow ladder near the street-corner trash can. | Aim Stabilizer (Snub) |
| 14 | Southwest of Bank of Tyrus, search the intersection north of the southwestern Supply Cache, next to the newsstand and closed bar. | Burst Capacitor (Injector); Retention Battery (Disruptor) |
| 15 | On the main route to the muster point, enter the statue building and inspect its southwest corner beside the Decha Timgad memorial. | Mod Slot (Lancer Mk1); Close-Quarters Barrel (Lancer Mk1) |
| 16 | After securing Bank of Tyrus and entering its vault, turn right to the case. | Mod Slot (Hammerburst); Huge Magazine (Hammerburst) |
| 17 | Inside the courthouse gate, search the tent on the right. | Mod Slot (Snub); Forged Barrel (Snub) |
| 18 | After the muster-point event and Bilefrogs, use the newly opened Warehouse District entrance; after the first enemy wave, inspect the wall beside gate 05 Amberstone. | Hardened Cover (Armor); Rock Steady (Armor) |
| 19 | From Warehouse District, follow the southwestern boundary to the dead-end alley and look beyond the body. | Forged Barrel (Proto Lancer Mod); Mobile Stabilizer (Proto Lancer Mod) |
The construction site, both parking areas, and the rooftop storeroom are separate stops. Treat a nearby marker as a reason to check elevation rather than repeatedly circling the same street. Case 5 requires entering through a climbable container; Case 13 uses a ladder to an apartment. Neither is described as a ground-floor doorway search.
At the bank, the underground parking and vault are also distinct. Clear the outside search before following the objective into the bank if that fits your current route, then turn right when the vault becomes accessible. The vault's narrative collectible and its Hard Case sit on different sides, so record the actual case reward before leaving.
Case 18 is tied to later access to Warehouse District. If the entrance is still closed, compare your main-objective stage with the description. Do not treat a locked story area as evidence that the case has disappeared or try to replace the access condition with an unrelated side activity.
West Kalona and the chapter's final section
| Case | Position to search | Identifying reward examples |
|---|---|---|
| 20 | In the third part of Hold the Line, inspect the shipping container on the west side of the courthouse encampment. | Mod Slot (Proto Lancer); Cover Brace (Proto Lancer) |
| 21 | Immediately after leaving the courthouse encampment, check the area to your left. | Close-Quarters Barrel (Longshot) |
| 22 | Search the upper walkway reached by a rappel line from ground level. This entry lacks a more precise street landmark. | Mobile Stabilizer (Breechshot); Forged Barrel (Lancer Mk1) |
| 24 | Inspect the southern front entrance of Kalona Hotel. | Reward details are not used to identify this stop. |
| 25 | Search the alley behind the convenience store on the northern side of the map. | Laser (Hammerburst); Skeleton Frame (Longshot) |
| 26 | After finding Whiskey Squad, inspect the wall-side area on your left. | Mod Slot (Longshot); Precision Long Barrel (Longshot) |
| 27 | After dropping from the hotel, go around the corner from the firetruck. | Mod Slot (Breechshot); Skeleton Frame (Breechshot) |
The numbering jumps from 22 to 24 intentionally. There is no usable position for Case 23 in this route, and a listed reward without directions is insufficient to send you to a particular building. Case 22 also has a weaker landmark than most entries; match an available rappel line and the elevated walkway rather than treating it as a precise map coordinate.
The hotel approach and the hotel exit are different searches. Check the southern entrance for Case 24 before assuming the later firetruck stop is the same container. This route does not resolve every ambiguous reward entry by assigning the same mod pack to multiple containers.
Act 2 No Gear Left Behind and Overrun
No Gear Left Behind
| Case | Position to search | Identifying reward examples |
|---|---|---|
| 1 | At the chapter-opening ruined street, enter the tunnel and search near its center among the wrecked cars. | High Capacity Mag (Gnasher); Ammo Scavenger (Armor) |
| 2 | After the muster-point cutscene, leave the tunnel and inspect the right side before the ruined semi-truck. | Proximity Regen (Armor); Auto-Canister (Incinerator) |
| 3 | At the plaza statues, climb the surrounding scaffolding and inspect the shipping container near its center. | Best Defense (Armor); Detonator Ammo (Longshot) |
| 4 | From that elevated search, return to ground level and inspect underneath the scaffolding on the opposite side of the street. | Springloaded Mag (Lancer Mk1) |
| 5 | Search the exit gate behind the golden statues before leaving the plaza. | Forged Barrel (Longshot); Concussion Rounds (Gut-Puncher) |
| 6 | Speak to Captain Grey and enter the courthouse; along that route, search the room on the left. | Fortifying Compound (Injector); Reload Servo (Disruptor) |
Cases 3, 4, and 5 form a compact plaza group. Search the shipping container above, the opposite scaffolding below, and the exit gate as three individual checks. Finding a container at one elevation does not finish the other two locations.
Overrun
There are no cases in Act 2 Chapter 4, Flyboys. The next three documented stops belong to Chapter 5, Overrun.
| Case | Position to search | Identifying reward examples |
|---|---|---|
| 1 | After defeating the first Reaver, climb the catwalk stairs, clear the Drones, and inspect the far corner. | Cover Brace (Hammerburst); Stability Compound (Injector) |
| 2 | In the tunnel left by the Corpser, clear the Wretches and Drones and search beside the side wall along the approach. | Precision Long Barrel (Snub); Incendiary Emitter (Disruptor) |
| 3 | At Zee's rally-point briefing, locate the Supply Cache and inspect behind it. | Mod Slot (Gut-Puncher); Extended Belt (Gut-Puncher) |
The rally-point stop is easy to confuse with the nearby hangar datapad. The datapad belongs to narrative collectibles; the yellow case behind the cache gives a weapon modification. Check both if you are collecting both categories, but keep the records separate.
Act 3 Stranded and Enemy Lines
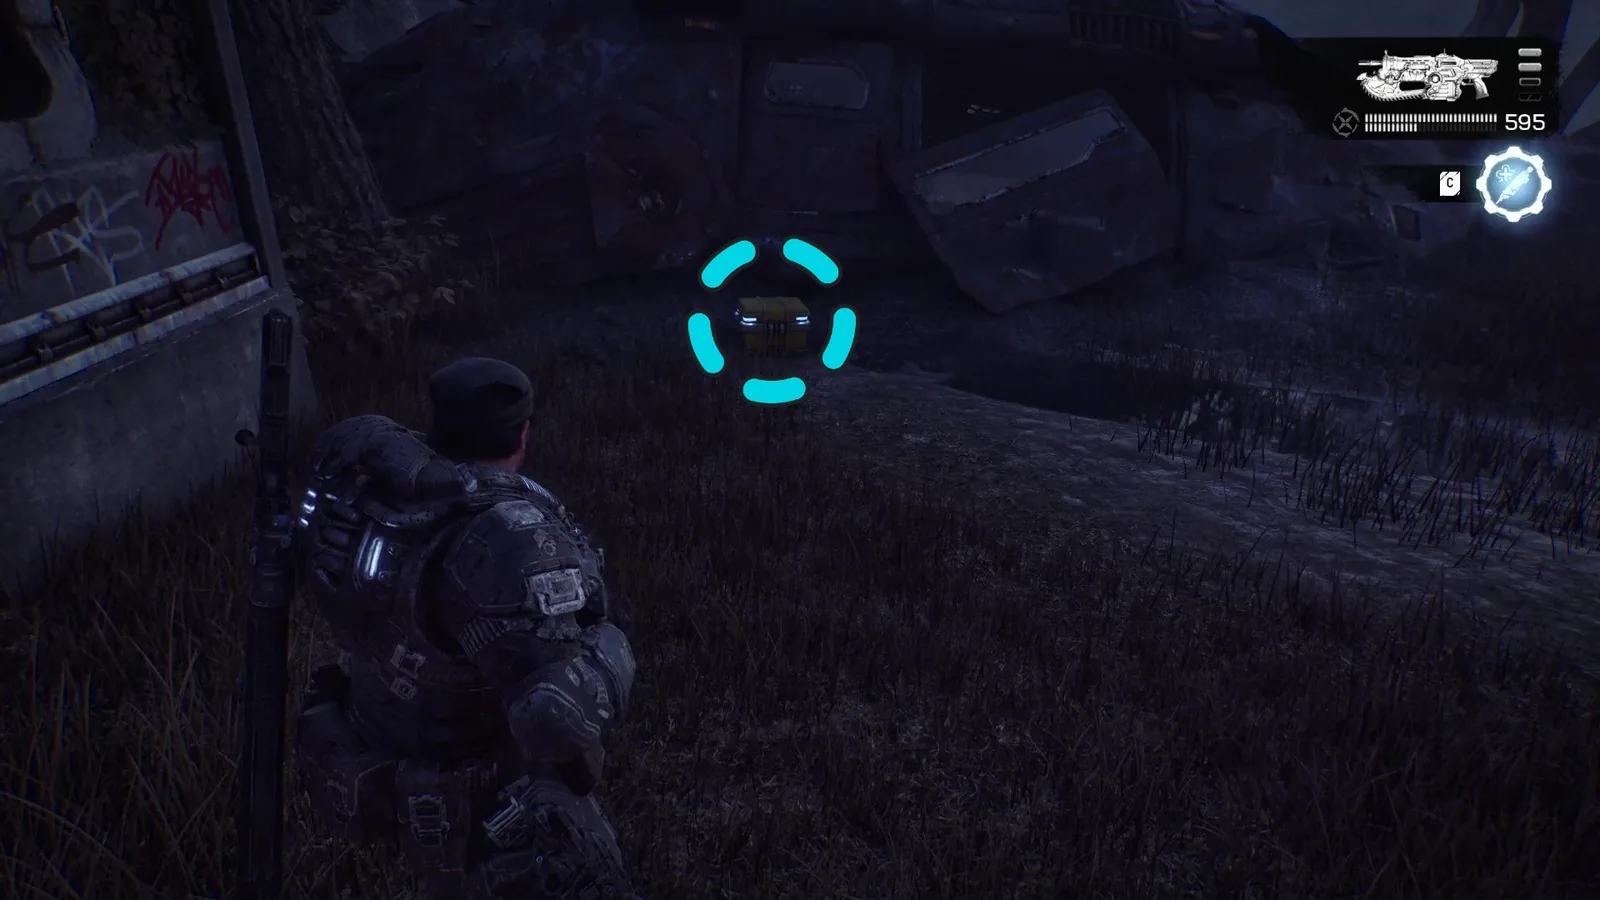
Check the area by the downed Raven for the opening Stranded Hard Case.
Stranded
| Case | Position to search | Identifying reward examples |
|---|---|---|
| 1 | After the Armored Wretch and Locust fight, check the downed Raven opposite the route into the base. | Huge Magazine (Prototype Lancer); Slick Breech (Gnasher) |
| 2 | Before reaching the hangar Supply Cache, inspect the area in front of the two red containers. | Composite Chassis (Hammerburst); Mobile Stabilizer (Hammerburst) |
| 3 | Enter the substation at the far end of the compound and search beside the wall. | Extended Magazine (Lancer Mk1); Smooth Operator (Armor) |
At Fairlight, look for the red containers before using the hangar as your only landmark. The substation case is inside, while the narrative target and map are outside the same building. Follow the container category you need instead of leaving once any collectible appears.
Enemy Lines
| Case | Position to search | Identifying reward examples |
|---|---|---|
| 1 | Near the opening hole exploration, search the ledge on the right side of the tunnel. | Cut Magwell (Lancer Mk1); Tactical Scope (Longshot) |
| 2 | In the underground subway station, climb the stairs and left ladder, then follow the upper room to its far end near the sniper position. | Hardened Resolve (Armor); Mod Slot (Armor) |
| 3 | On the opposite upper walkway, inspect behind the stacked timber. | Full Auto (Gnasher); Active Compensator (Ripper) |
| 4 | At the wrecked train, climb onto the tracks, turn left, and search the ruined platform. | Vitality Amplifier (Injector); Radial Emitter (Disruptor) |
| 5 | Cross the subway car to the other tracks, turn left, and climb to the next platform. | Reflex Compound (Injector); Focal Lens (Pulse Drone) |
| 6 | After the fight at the sunken courthouse ruins, search ground level beside the large hole. | Cylinder Choke (Incinerator); Auto-Rig (Snub) |
| 7 | Inspect underneath the toppled statues in the courthouse area. | Mod Slot (Incinerator); Cut Magwell (Incinerator) |
| 8 | After the cutscene showing the Locust force, continue into the sewers and look near the Supply Cache and dead Gear. | Precision Rifling (Proto Lancer) |
The subway route alternates between upper walkways and train platforms. For Cases 4 and 5, use the wrecked train and the crossing through the subway car as distinct orientation points. Repeating “turn left” from the wrong side of the tracks can take you back toward the previous pickup.
Act 3 Last Foothold and The Convoy
Last Foothold
| Case | Position to search | Identifying reward examples |
|---|---|---|
| 1 | At the mission's beginning, turn left and inspect the devices on the other side of the subway entrance. | Composite Chassis (Longshot) |
| 2 | After the emergency broadcast and apartment exit, look across the street near the ledge. | Close-Quarters Barrel (Hammerburst) |
| 3 | After meeting Tai and crossing the bus, turn right to the truck. | Explosive Resonance (Pulse Drone) |
| 4 | Follow Captain Grey into the library and inspect beside the Supply Cache. | Combat Scope (Lancer Mk1); Plating (Striga) |
| 5 | At the northern cafe with the Supply Cache, search the sidewalk in front. | Mod Slot (Ripper); Gas Regulator (Ripper) |
| 6 | Reach the awning above Landa Memorial Hospital and inspect against the wall. | Burst Capacitor (Stim); Burst Capacitor (Pulse Drone) |
| 7 | Enter the underground garage west of Monroe Library by sliding beneath either gate. | Feedback Resonance (Pulse Drone) |
| 8 | Search the Last Dollar store on the raised walkway west of the library. | Stacks on Stacks (Armor) |
| 9 | Reach the elevated skyrail platform southwest of Landa Memorial Hospital. | Executioner’s Blade (Breechshot) |
| 10 | From the library, go south and descend the stairs to the river walkway. | Muzzle Brake (Incinerator) |
| 11 | At Kalona Coast Pharmacy north of Kalona Hotel, shoot out a window and climb inside. | Marksman Scope (Breechshot); Forged Barrel (Ripper) |
| 12 | West of Kalona Hotel's entrance, search near the convoy meeting point. | Retention Battery (Stim) |
The library and hospital are useful anchors for grouping this district. Check the library interior, western garage, raised Last Dollar walkway, hospital awning, and skyrail platform as separate elevations. The underground garage explicitly uses a slide-under entrance; looking for a normal open doorway is the wrong approach to that stop.
The Convoy
| Case | Position to search | Identifying reward examples |
|---|---|---|
| 1 | After the initial convoy defense, search among the boxes in the courtyard at the road's end. | Holo Sight (Gnasher); Springloaded Mag (Proto Lancer) |
| 2 | On the upper bridge route toward the East Control Room, reach the sniper platform and search inside the truck. | Holo Sight (Striga); Equipment Scavenger (Armor) |
| 3 | After defeating the Reaver beyond the control room, inspect the bridge's left side near the next gate. | Soft Launch (Gut-Puncher); Focal Lens (Stim) |
| 4 | Near the bridge's far end among the trucks, look on top of the two boxes. | Stabilized Shroud (Striga); Revive Valve (Stim) |
| 5 | After using the rappel lines to enter the next control room, inspect the shelf beside the door before pulling the lever. | Composite Chassis (Ripper); Skeleton Frame (Proto Lancer) |
The last stop is tied to a clear action boundary: inspect the shelf before operating the control-room lever. The truck case earlier on the bridge and the box-top case later are different containers, so keep both on your chapter checklist.
Keep an incomplete route honest
This page does not provide positions for Desperate Times, Desperate Measures, or the later acts. Their absence here does not imply that those chapters contain no Hard Cases. The available Act 3 chapter count includes cases beyond the twenty-eight positions mapped above, but a count is not a location route.
If you cannot find a listed case, first compare the chapter stage, final landmark, and elevation. Next check whether you already opened it and whether the reward is present in your campaign options. In co-op, verify your own War Journal and Forge records. The October 5 progress fixes do not establish that joining the host grants all earlier rewards, and this route does not promise such inheritance.
For the unresolved Act 2 entry, continue using the game's local proximity and map cues rather than searching an invented coordinate. Preserve the gap on your checklist. That keeps the confirmed route useful while distinguishing a missing direction from a collectible you have actually found.